


by Bob Coates
Texas School Instructor
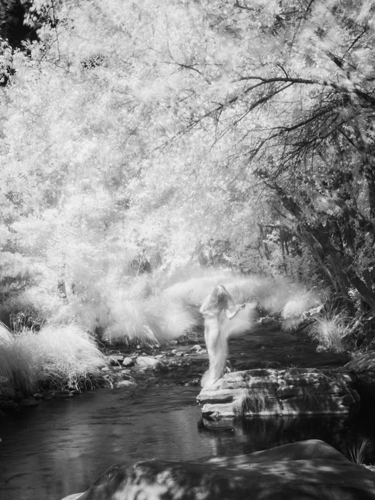
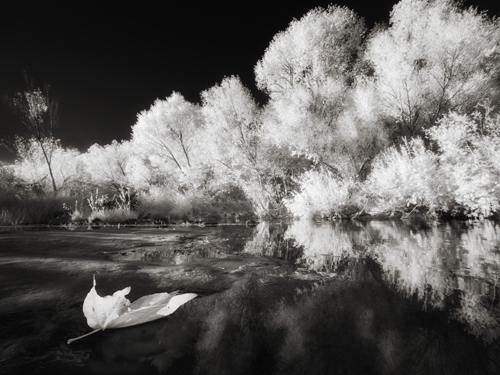
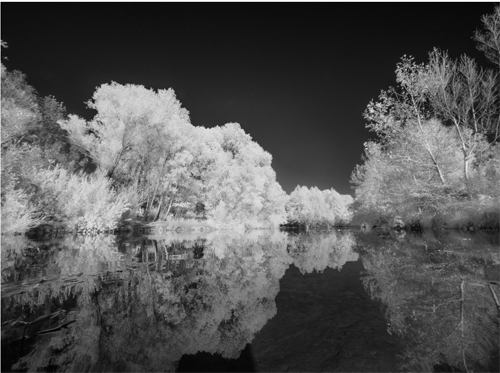
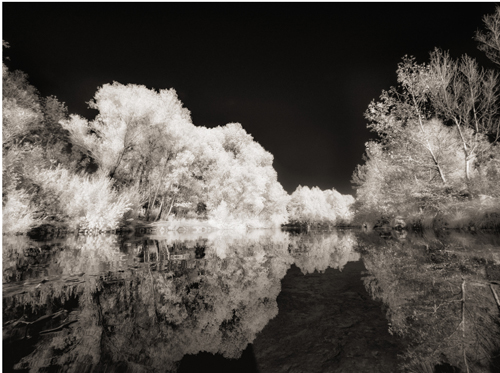
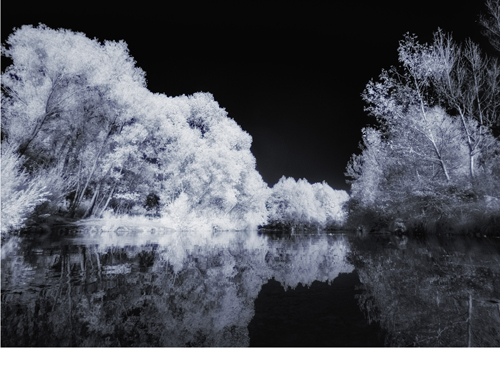
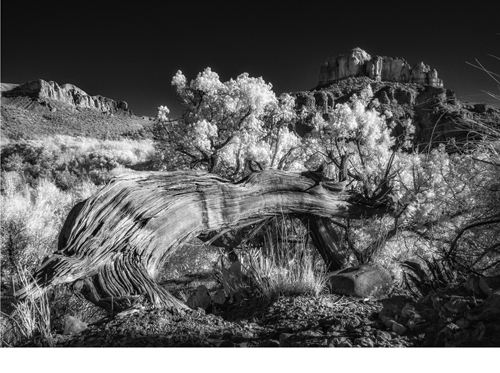
Contrast and tone replace color when creating black and white images. Shape, form and composition seem to rise to the forefront as well. When you add in the look of infrared you end up with another LAYER to enhance an image. Chlorophyll laden trees render a glowing light. Blue skies show very dark, sometimes black, so clouds pop and have more depth and dimension. These effects are magnified by shooting in full sun. That harsh contrast is what tends to have us put up our cameras through the middle of the day. Infrared revels and shines in the bright light of midday. Can you tell l really enjoy infrared imagery?
Getting Started – Film Days – I’ll drop back a few years to when I first started capturing IR images. Let’s begin with loading and unloading IR film into the camera. A dark bag needed to be used as IR film was extremely sensitive to light. Opening the camera back without thinking could ruin over half, if not all of the exposures. Adding IR filters to the lens to decrease the visible light spectrum added a lot of grief to the process. In addition, focus of IR light is rendered on a slightly different plane than visible light.
The process often went, focus camera, make adjustment for IR. Screw on filter without messing up the focus just established. Make photo. Remove filter. Repeat. Finish the roll of film. Back into the bag for removal. Place in light tight canister. Send away for processing. And then wait to see if all went well. I just got tired thinking and writing about the process!
Infrared Today – Digital imaging and Live View capabilities of cameras has changed the infrared capture process. The visible light filter is changed to infrared inside the camera. Focus is set for the infrared so what you see in focus needs no adjustment. Cameras can be set to monochrome in order to give you a better feel for how the scene will render in black and white.
Dedicated Camera – Instead of changing your film to infrared, you now dedicate a camera to IR capture. You can grab an older model camera that is sitting on the shelf gathering dust and give it new life.
For my first conversion I used a Lumix G6. I used it quite a bit. I recently decided to work more in infrared capture. To step up my infrared capture game the Lumix G6 was sold and my Lumix GH4 was converted. This gives me a more robust magnesium frame body with weather sealing. It also has a slightly stronger dynamic range. There are a few IR conversion companies. I choose LifePixel (lifepixel.com) and have had good success and service with them.
Infrared Conversion – Another advantage these days is the variety of IR conversion filters that are available. Full spectrum, Deep Blue, Enhanced, Hyper Color are some of the choices and more. Each captures a different part of the light spectrum. Each requires a different type of processing to get the effect for which you are looking. I like the standard 720 nanometer spectrum which gives a traditional IR look.
You can learn more at the LifePixel site. There’s a ton of information there and you’ll want to research before making up your mind.
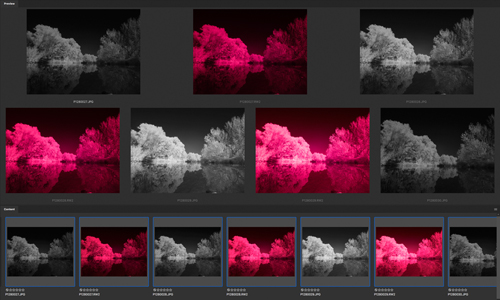
Making Images – I recommend, especially when starting out with IR capture, to bracket your exposures. Usually three exposures one stop apart is sufficient. This gives you different densities of files with which to work. To better see a result set your camera for Monochrome. This gives you a lot more information related to the final photo. I also recommend capturing in RAW + Jpeg. If you photograph in just the RAW format you will see a magenta file once the files are downloaded. Even though you see black and white on the back of the camera when importing files that image is stripped out. If you include the Jpeg in your capture you will see the black and white image next to your magenta file.
This brings us to the next step in present day infrared imaging.
Processing IR Files – Because visible light is removed when using infrared filters the RAW file will need some massaging before becoming enhanced to its final glory. Each IR filter has a specific way of being processed. The LifePixel site has lots of information and tutorials to get you started. I’m using the Standard IR filter (720nm) so my processing will reflect what I share here. You’ll find my processing is different than what is recommended when you look up IR processing.
First I look through the black and white versions of my files to check on detail and which exposure looks to have all of the information I need. Another benefit of making multiple exposures is to blend files together to create a higher dynamic range when necessary. If an image is looking good but slightly over-exposed in just a few places I can grab the one-stop less exposure and strip in that information using a Layer Mask.
First stop is Adobe Camera RAW. You can use Lightroom as well if that fits your workflow better. I take the Saturation slider and pull it all the way to the left. This turns the file look black and white. All of the color information is still available to make adjustments. Back up to the top of the adjustments. Initial overall exposure is first, followed by adjustments to Highlights, shadows, Contrast, Blacks and Whites. Depending upon the subject I may add some Texture and Clarity. Most times I just want a solid, full toned black and white.
Once the black and white image has been rendered with detail in highlights and shadows, it’s off to Photoshop. Adding a Soft Light layer and painting with black or white set to a low opacity makes dodging and burning a snap. Dodging and burning can fix issues or used to enhance depth and dimension by pushing the shadows and highlight a little bit.
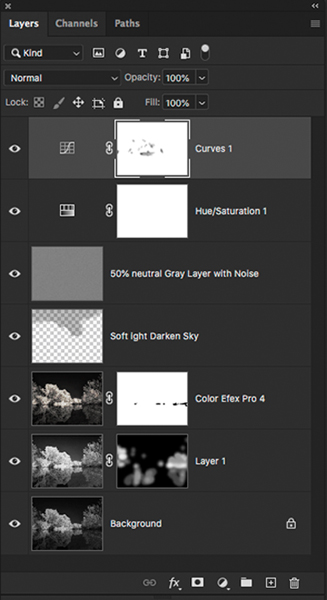
Finishing Touches and Toning – I’ve found NIK filters to be an ideal way to move the image more to the traditional IR look. Other plug-ins such as Luminar 4 can be used as well. In the NIK filters palette I open Color EFX Pro 4. First step is to use Tonal Contrast. I find that enhancing contrast helps to hold the image together before adding the next filter. Glamour Glow is added to give the photo that ghostly feel of traditional infrared. After the return to Photoshop a Noise layer is added. A blank layer is set to Overlay Mode. Then Filter>Noise>Add Noise. I often use the Gaussian Distribution but it doesn’t hurt to check out Uniform mode. Experiment with the Amount to taste. Another Soft Light layer is added for some tweaking and enhancing. You can stop right here or move to tone the image.
While I’m not a fan of most color infrared images I enjoy a slight color shift or split toning to add some more interest. Toning can enhance your image and make it feel very different. Sepia feels warm and nummy. Adding a little cyan cools an image and gives it a totally different stature. Warming the lighter tones and adding blue to the shadows can create a mysterious feel.
Benefits – Here are your takeaways. Infrared conversion adds new life to an old camera. It increases your time of working creatively with a camera as IR shines when the sun gets high. It gives you a whole new way of looking at and capturing the world around you.
 Bob Coates is from Sedona, Arizona. He has been a successful photographer for well over 20 years working on various genres including weddings and portraiture. Concentrating fully now on Commercial and Fine Art Photography, he teaches a class on “Nature, Macro, Floral, Animal, Landscape and Travel Photography” at the 2021 Texas School of Professional Photography.


