


 Underwater photography can be fun and challenging and it can take a lot of work to create a fabulous work of art. Although the basic technique may be similar, no two sessions are the same. But that’s why I love it! Whether it be sports, artists, beauty queens, mermaids, designer gowns, families, children in costumes, maternity, or even wedding dresses, each underwater session has its own unique set of circumstances.
Many of my clients have seen underwater images before they come in and I will tell them that we can create the look and feel they want but I’m careful to not tell them that we can create an exact image of one they’ve seen. One reason is the unpredictability of photographing in the water and the other reason is that I prefer to create a vision of my own.
To achieve results that please the client as well as my own artistic vision, I’ll make a list of thoughts and ideas ahead of time and will often draw a thumbnail sketch of the concept I’m trying to achieve. Still, there will be events that are planned as well as others that are unplanned. Again, that is what makes it fun and challenging.
There is something about photographing underwater that makes me feel free, whether I’m on the bottom of the pool or floating on top of the water. My artistic vision is clear and I see images fly through my mind. But it is not all relaxing and one must pay close attention to the subject and must be aware of changing lighting conditions. The sun will be out one minute and then a cloud appears and everything changes but the unpredictable elements of an underwater session often allows for some amazingly creative images.
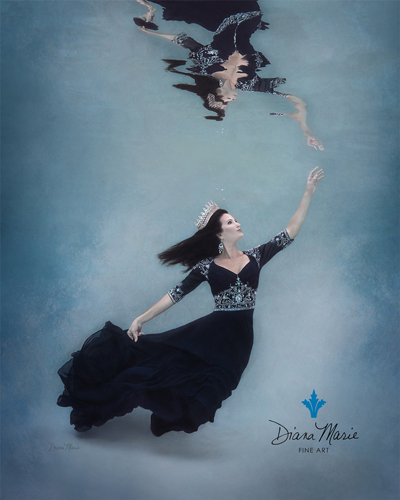
One interesting underwater session involved Mrs. Texas United States 2017, Ann Marie Reigrut. Although we had never met prior to the session, we had communicated ahead of time about ideas and what to bring. We had decided to photograph her with a beautiful gown and her crown and possibly her sash from the pageant when she was crowned in May of 2017. She was advised to wear her regular make-up but definitely use waterproof mascara and eye liner. Even underwater, makeup does alright as long as they do not rub their face.
 Next, I advised Ann Marie to bring undergarments that match her skin tone and also her dress. The reason for both was that you often don’t know until you are in the water which one is best. She was also told to bring shoes and that we would be doing some images with shoes and others without them. Special hair is not necessary unless they need some kind of wig or hair extensions and this depends on the person and the look they desire.
Almost everything I’ve put into the water has come out just fine by washing it off with water and/or in the washing machine and dryer. But I was a little concerned about Ann Marie’s crown and sash. Efforts to find out what material the crown was made of were unsuccessful and we discovered that if something happened to the crown itself, it could not be replaced. So, a decision was made to take several images in the studio of the crown on her head, moving around to get every conceivable angle, because we had no idea how her head would be positioned once we were underwater. We did the same with the sash. There was no sense in taking any chances with either item since they could not be replaced.
Once the studio images were complete, we headed to the pool. The plan was to create beauty and elegance that would portray a queen. We began taking pictures in the shallower water to get comfortable before moving into the deeper water. This is something I do, especially if they’ve never done an underwater session before. The clothing worn by the subject is another important consideration. If they are in a big gown or heavy clothing, it is more difficult than if they are wearing something lighter weight. Having an assistant with you is also a good idea because safety is a top priority.
 When photographing underwater, there are many things to look for, but the direction of the sun is quite important. I prefer to photograph in bright sunlight, in the middle of the day… something that is traditionally not done for other types of photography. One special item I use often is a floating scrim with a white fabric across the top to filter the sun light, much like a giant soft box.
My camera of choice is a LUMIX GH4 in an Underwater Naticam Housing, used with two Sea and Sea Underwater Strobes. Sometimes I will use the strobes and sometimes just natural light. Different lighting conditions call for different techniques and lighting underwater is quite challenging. In a typical session we might use a variety of props, fabrics, and backdrops in the water. Everything that goes into the water then goes into the washer and dryer afterwards.
To obtain more of a professional studio image, I’ve used backdrops made of the Freedom type cloth but, although it does well underwater, it is not quite wide enough for me. To solve this problem, I purchased four cheap king-size sheets (two black and two grey) and sewed them together. They work very well and provide a large covered area of the pool. Also, because everything in the water floats, it is necessary to weight them down. To solve this issue, I purchased ankle weights that are typically used for working out and use them to keep things in place underwater. In addition, I also purchased several colors of chiffon fabrics about five yards each in length and had the edges sewn so they would not unravel. Chiffon is perfect in the water. It flows nice, is easy to handle, and goes in the washer and dryer after use. Other more traditional equipment used includes a scuba mask and weight belt for myself as well as my assistant. Sometimes even the subject needs some weight and I have a couple of extra scuba mesh weights for them to use.
For the session with Ann Marie, I found a small crown at the house and had her wear it under the water. There was no intention of using this crown in the final images but I wanted to see how the position, lighting, and look would be underwater. As it turned out, this was a big help and we took a variety of images using it. When the session was over, everything was picked up, washed, and dried. My pool is a salt water pool and is easier on things than chlorine pools, but it is always best to wash everything to keep it in good working order.
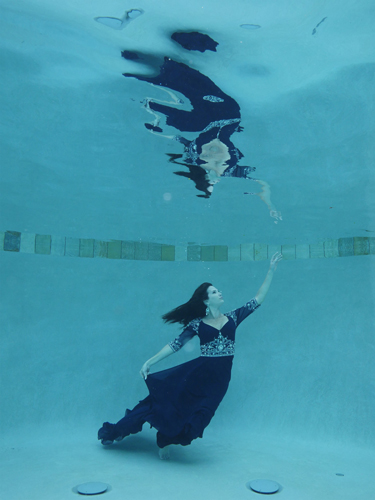
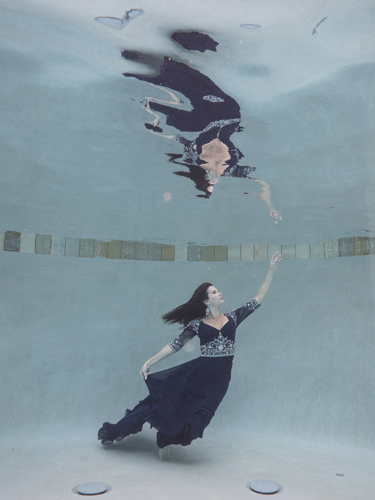
The next step is to bring all the RAW images into Lightroom and do a quick color correction and some other adjustments to help with backscatter. The images will be blue initially and after the color correction it is easier to select the favorites. Next, the images are transferred to Photoshop where distracting objects such as drains, pool tile line, backscatter spots, and other items can be removed. Of course, Photoshop offers an endless number of tools to achieve practically any desired result. (continued on page 33)
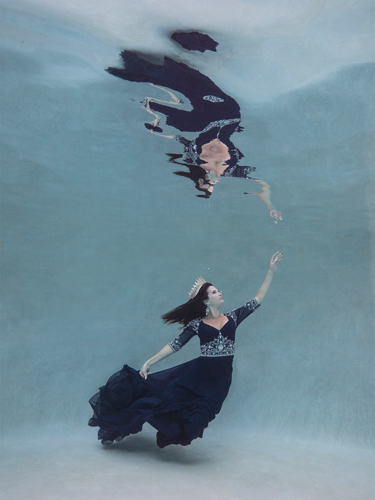
Because we could not use her original crown, it was necessary to replace the temporary crown used in the underwater shots with the “studio” crown. After color correcting the “studio” to match the underwater version, I used the temporary crown as a guide to make the studio version look as if it had been taken underwater. It was a lot of work, but the crown turned out really nice in the final image.
It can take many hours of work to create just one piece, but I truly love using my artist vision. To be underwater photographing and creating images is exactly where I love to be and where the magic begins!
 Diana has a Bachelor of Science Degree Art all level from the University of Houston. She taught Junior High Art and then High School Photography. She was chair of the Visual Arts Department at Cypress Falls High School and retired from teaching in 2000. She began her photography business, Diana’s Photography, and began photographing portraits. Diana loves art and photography and a dream was to do her photography as Fine Art, so this past year she created her Diana Marie Fine Art and began showing and selling her work in Galleries. Diana is represented at Perimeter Gallery and Disegno Studio both in Houston Texas, at this time. You can view her Fine Art work on DianaMarieFineArt.com and her studio work on Dianasphotography.smugmug.com.


