by Malinda Julien
The point of food photography is to create a desire to eat that particular food. Chefs around the world create dishes with this artistic vision in mind. Food is not only sustenance; it is also beautiful and creates desire. Creating that desire photographically means we must recreate an experience, an emotion, and definitely a craving. We can’t use smell, touch, or taste… only vision. The vision has to carry the mind to connect the other senses.
The recipe for such a delicious photograph includes angle, lighting, camera settings, lens choice, and styling, with a helping of love and a little pinch of know-how. Creating these images is just following a recipe. What are you cooking? What ingredients do you need? What type of vessel to cook in? What dish to present? Mood? Styling?
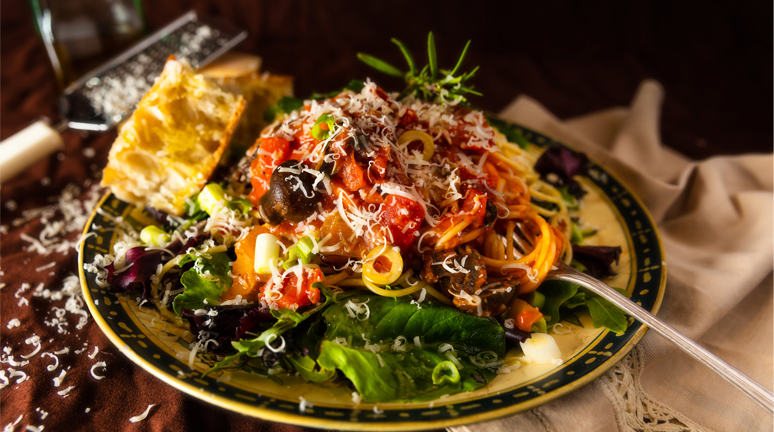
The set-up is very simple: a C-stand with a background forming a sweep from slightly behind and across the table, one strobe with a small softbox with a grid set slightly below the table camera left and pointed up and across at about 30º allowing the edges of the box to light the dish.
The camera is on a camera stand centered before the table, with one shot using the 100mm macro and the other two using the 24-70mm (Note on the lens: turn off image stabilization and auto-focus. Leaving these on will cause lack of sharpness. A remote shutter release is essential). Reflector board is hand-held, directly opposite of the softbox, and as close to the subject as possible.
Camera settings: ISO is at 100 on all shots. I keep the ISO as low as possible, and always shoot on a tripod for maximum sharpness. The exposure is bracketed as I may use a shadowed image over a highlight image in post to bring in some edges or darker areas. I bracket 1/3 (plus-minus). The camera is set for 1/160 at f5. The strobe is set on 1/32 power with a Kelvin setting of 5600.
I have chosen a plate with harmonious colors (but not competing), a soft good (napkin), and some older utensils that have been sprayed with matte finish spray. In addition, there is some torn Italian bread, a wedge of Parmesan cheese, a hand grater, and a bottle of olive oil on hand which may or may not be used.
The greens need to be fresh and green and are therefore kept in ice cold water until the shoot to keep them peppy looking. Then, they are slightly dried before being placed on the plate to avoid excess water. Placing the right shapes and variations of greens is done only around the edges of the plate, as more will be added later where needed.
In order to keep the pasta tall, it is cooked to al dente’ and allowed to cool, creating a sticky feel from the starches on each strand. It is easier to put in a place and have it stay. A small inverted bowl is set in the center and the pasta in place in a conical shape.
Individual vegetables are placed around and on the sauce. It is important to have each ingredient show. This way, the dish is described in both words and photographs. I photograph each progression of the dish to keep it in case it is needed for an overlay or a different layer in postproduction.
Now, the image is coming together and we look to the addition of the olive oil drizzled for extra shine and color with the final addition of the freshly grated Parmesan cheese. I photograph continually during each pour of the olive oil and addition of the cheese. This aids in later editing, as oil dripping and cheese grating are not always a perfect science. Offset tweezers are often used to move small curls of the cheese to create eye movement and will syringe in some olive oil in exactly the right place.
Once I am happy with the way the shot is coming up on the laptop and check for sharpness, I move the lights slightly and the camera angles to ensure that a spectacular vision from a different perspective is not missed.
The lenses are also changed from 100mm f2.8L macro to 24-70mm f2.8L for wider shots. Shooting this photograph Top Down would not have been necessary as the height of the dish would have disappeared and the tiny details of the spaghetti would have been lost. From start to finish, this shoot is about 2 to 3 hours, not including the cooking of the recipe.
Photographing food is absolutely my passion. My husband and I owned a restaurant and nightclub and we love sharing our love of food with everyone! Photographing food not only makes us a living, it makes us complete.
www.JulienLambertPhoto.com.
