


Fresh Grapes with Cyanoacryalte and Antiperspirant Glaze. . . Served with a side order of cosmetic sponges and glycerin, right? Not exactly a typical menu description, but they’re definitely key ingredients in the recipe for a food photographer. “We eat with our eyes.” No one really knows where this phrase first appeared; however, we all know what it means. Food is not only nutrition but it is desire — we want what we see. Chances are when you see luscious-appearing food photographs, they are altered slightly to present their best image. Talk about makeup and wardrobe! Angles, lighting, styling, color choices, and a lot of other decisions go into creating a food photograph or dressing food for a film set.
Presentation of food is a fascinating industry. Chefs, dishware designers, food stylists, and photographers know that proper styling of the food is paramount. Welcome to the awesome and exciting world of food photography. Whether for a magazine, advertisement, film set, or social media, the image-capturing techniques of our most universal and beloved subject — food — are almost as fascinating and varied as the recipe itself. Chefs and cooks alike offer a myriad of ways and skills in creating a dish, and so does the food photographer. There is no one way to achieve the perfect shot, because beauty is in the eye of the paying client.
This article is not meant to be an all-inclusive instruction as much as it is just a glimpse of how we created these shots. It covers what appears to be an easy shot, a simple presentation of fresh fruit.
We begin with decisions: mood, hero choice, use of image, format needed, items offered for sale or editorial, extra items to be included, recipes, plating presentations, whether the shooting is on location or in studio, whether we are styling or if there is a stylist provided, whether we purchase and prepare or are receiving items, and the list goes on and on.
To cover a full food shoot from beginning to end would take more space than this article allows. So for the purpose of brevity, we are going to assume this is a mood shot only, no sales. This is important, because we do not have any restrictions on food enhancement. If this was a for-sale item, it must then be presented in its natural state.
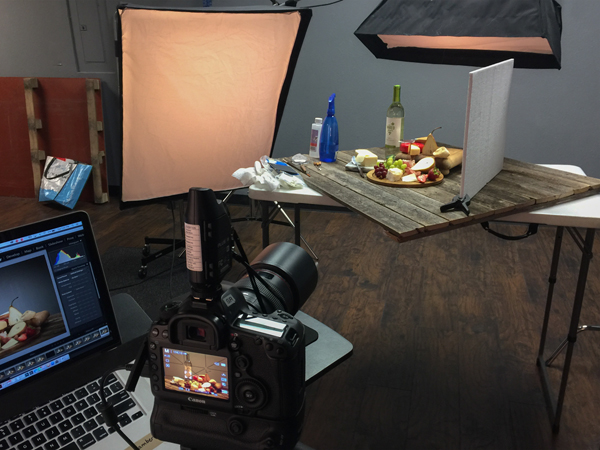
Recipe Equipment includes: Canon™ 5D SR, Canon 100mm f2.8L macro lens (shoot #2), Canon 24–70mm f2.8L lens (shoot #1), Camera stand, Tethered shooting, MacBook Pro, Novatron 1500 VR lighting system (Yes! We use everything until it no longer works; these are over 20 years old), soft boxes on main and fill (with strip on overhead light and honeycomb grid with barn doors on background), Pocket Wizard Plus IIIs, Color Checker (X-rite), Sekonic LiteMaster D-478D Light Meter, 18% grey roll paper (shoot #2), white roll paper (shoot #1), footstool (we are short), white bounce boards (Styrofoam) with clips to hold upright food styling items.
Natural Props include: floor lift, wooden breakfast tray, off-white square plate, wooden bowl, antique off-white napkin, antique fork, coffee cup (darker tan with green handle to mirror the green grapes), and cat jar for whimsy.
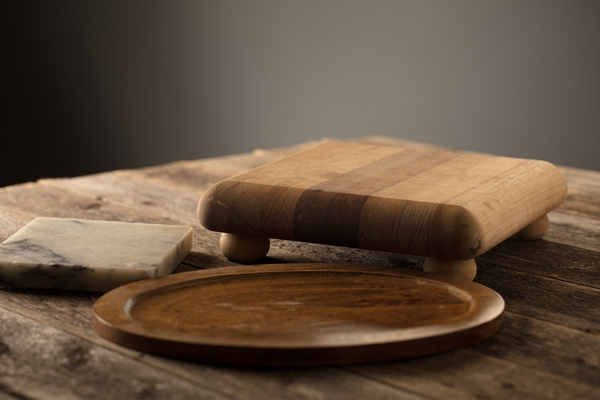
Moody, Enhanced Props include: wooden oval plate, granite, grey square, wood and stainless cheese knife, clear wine glass, elevated small wood cutting board, wood specialty cheese knife, wooden-fence tabletop, white plastic table (to elevate items), food enhancement products.
Other Food Enhancement Products include: glycerin, spray antiperspirant, wedge sponges, T-pins, spray bottle for water, Freshen Up™, cyanoacryalte, small brush.
Food purchased from Aldi™ grocery store include: fresh green grapes, on the stem; fresh red grapes, on the stem; fresh Bosc pear, halved; fresh strawberries, whole; bread, French loaf, halved and sliced on the diagonal; butter, softened and spread on bread halves; Prosciutto; coffee, in cup; sugarcubes, in cat jar; white wine (Naked Grape™ brand); cheese, Havarti, brick-style; cheese, Gouda, red-wax-sealed round.
Let’s begin!
We begin with the shopping list and head off to the market! For each of the products involved, we must sort through many items to find just the perfect one.
Begin with sorting through all the food items to find the most pristine specimen. This will be referred to as “the hero.” The others are the stand-ins.
The first shot will be a top down, with more of a breakfast feel, a light and airy composition. In the example, we have left the bottom left corner open for copy.
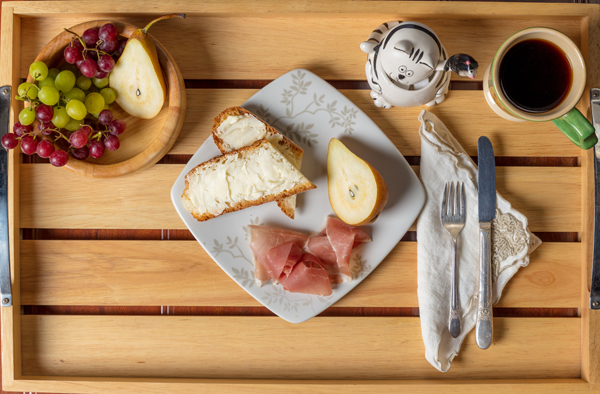
 On this shot, we used the Canon 5D SR, Canon 24–70mm f2.8L lens. Our lighting is two (2) soft boxes with side lighting and a strip soft box with a diffuser, to further soften from the top back, angled slightly in. The floor is slightly elevated on a plywood panel sitting on 2x4s. (Note: if we had made the flooring the white paper, it would have been distracting to have white lines showing through the cracks in the breakfast tray.) Our camera settings are: ISO 100, 55mm, f5.6, 1/125 sec. in raw .C2). This shot is shot naturally, without the use of enhancing products. Post processed using Adobe Lightroom™, with slight color correction, clarity +3,vibrance +2, sharpening +10 with noise reduction +5, there is no Photoshop used in this shot, basically SOOC.
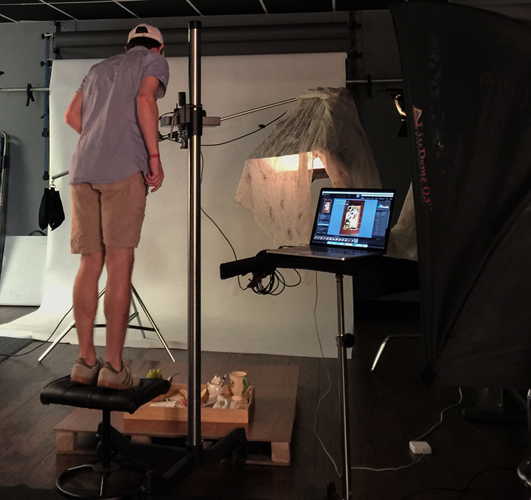
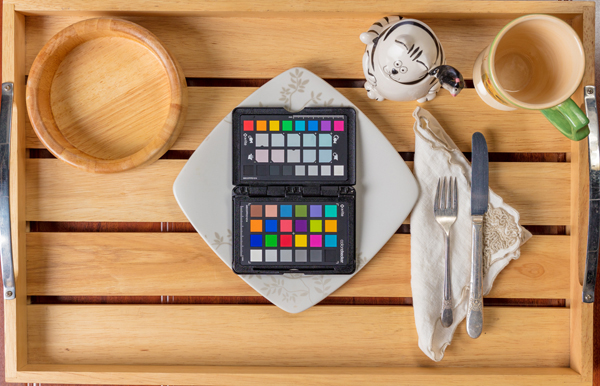 Our next shot, shoot #2, uses a different angle and styling. We lay out the set, take a few color-checker and exposure shots and then begin to build the set.
We are also changing the lens to the Canon 100mm f2.8L, dropping the grey background, and elevating the angle to point of view. This shot will be enhanced with glycerin, spray antiperspirant, cosmetic sponges, T-pins, Freshen-Up, water spray, and cyanoacryalte.
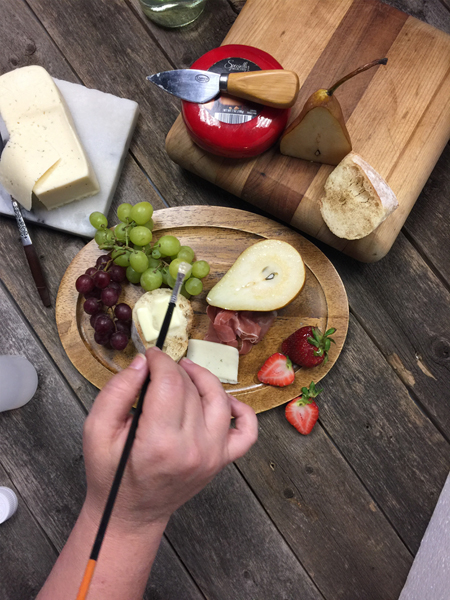
 The lights are moved to the rear left, and bounce boards are placed to the right. The boom is a strip softbox coming from slightly camera right. Background is changed.
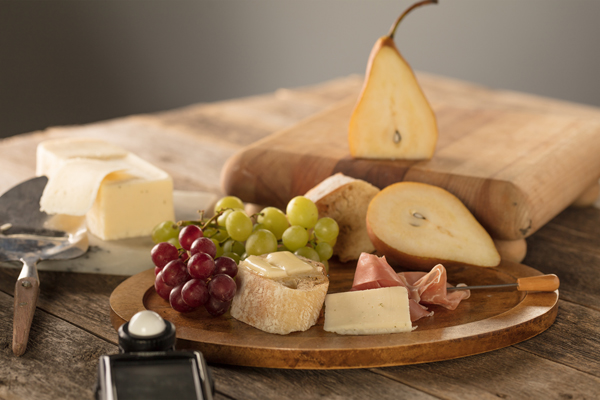
The shot is more dramatic using heavier lighting ratios. We vary the light on the background by simply moving the light further from the background to go from grey to black. Once we have our composition laid out, allowing for graphics or logos, we shoot two variations for the mood setting for fresh fruit as an evening event or romantic interlude.
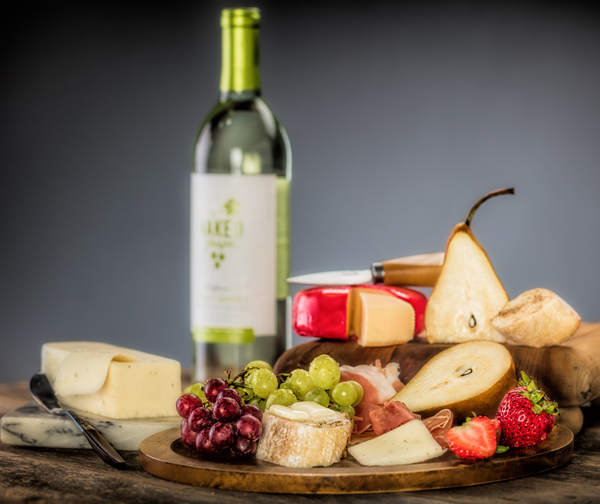
We have created a completely different look! Cropping and the addition of a wineglass are the changes. The advantages in learning food photography are that it is challenging and will push your ability to concentrate. Because each shoot can take several days, you are creating a still life. So let your inner artist out! Food doesn’t talk back, and everything you learn also applies to just about any macro work you may do. I love food photography, even through all the fashions and styles of how it looks. Grab a grape, a light, and a camera and create your own recipe!
 Malinda M Julien, CPP, is a second generation professional photographer from Fort Worth, Texas. Photography has always been a part of Malinda’s life and her entire family now works at their studio. Julien & Lambert Photographic Services is a commercial photography company specializing in architecture, fashion, editorial work, industrial, products, and food photography. She attended the University of Texas at Arlington and says she is a “constant student of all things photography.” Jon Julien, her husband, is their equipment person, drone pilot, and second shooter. Son, Charles Lambert, is the co-owner of the company and has a degree in Fine Art Photography from Hardin Simmons University and son, Jon Lambert, is their architectural photographer with a degree in Architecture from Texas Tech University. Learn more about this incredible family at www.JulienLambertPhoto.com. Malinda will be teaching at Photogenesis, September 29- Oct. 1.


