


by Jackie Kramer, Texas School Instructor
“An imaginative photographer maintains his sense of wonder, imagination and curiosity always going hand in hand…
And it is he, through his pictures, conveys to others the beauty and excitement of the world.”Andreas Feininger
Imagine sitting around a campfire with friends or family and reminiscing…. As layers of history unfold poignant memories are evoked as though it were yesterday. You don’t have to close your eyes to feel the emotions stir within. Why not infuse our images with the same dimensions? Creating one image built from multiple layers born from the same place and time can define more than just a single subject, whether it be a single flower or a wide-angle scene. In fact, what this approach has done for me is to deepen my connection to the places in which I shoot, whether it be in a botanical garden or a forest. A number of techniques can be employed in the process ranging from straightforward to complex.
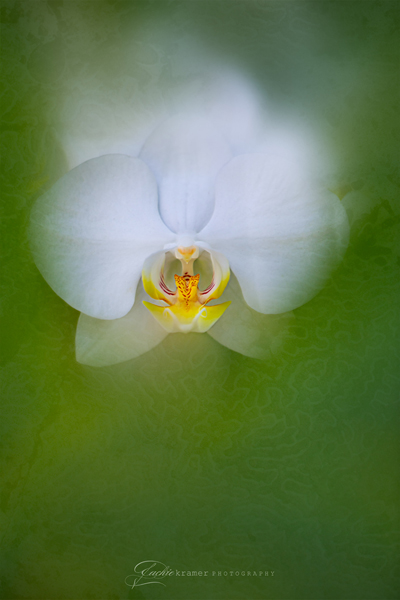
Shoot Through – Inviting multiple layers into a single shot is the simplest method. Flowers (or leaves) can form a veil both in front of and behind the main subject. While a beautiful landscape image can clearly illustrate the entirety of a scene, this technique blends the layers in a way that only a macro lens can. By shooting up close and “through” petals to render them completely hazy and focusing on your subject just beyond, you have merged the two layers. When the background is also unrecognizable, that introduces a third layer.
The biggest challenges are spatial, both on the horizontal) and vertical (x and y) axis. Finding a good candidate starts with a “hunt” for an interesting subject sandwiched on the horizontal (x-axis) between a foreground dense enough to provide a “haze” and a background far enough from the subject to render out of focus. The foreground needs to be very close, almost touching your lens. Selective focus is attained by use of a fairly wide aperture; mine is typically set in the f/3.5 to 4.5 range. While single point focus is my preferred method of auto-focus on my Canon macro lenses, I switch to manual if the auto-focusing mechanism tries grabbing the foreground instead of my subject.
Managing the overlap between the foreground and subject on the vertical (y-axis) is also essential. Dancing around the point in which haze starts to obstruct the subject is critical. In many situations, what you see in the camera doesn’t accurately represent what’s recorded on the sensor. Always remember to evaluate the image in the field and adjust vantage point accordingly. Finally, I try not to leave the scene until I have nailed focus on my subject, especially important when shooting with a shallow depth-of-field.
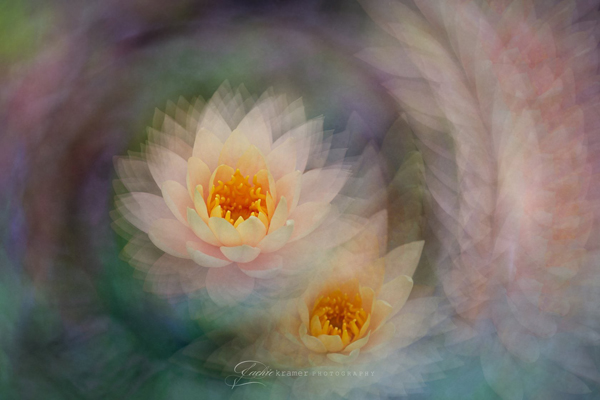
Multiples in Camera – This is yet another method of incorporating ancillary flowers, foliage, and possibly other elements into your image, layer upon layer. While the additional elements aren’t discernible, they do add intrinsic depth to the final image. Because I love being able to freely move around my subjects to get just the right vantage point and composition, I rarely use a tripod when in the field. I also prefer to pack my bags with a variety of lenses and a bit of lighting gear so my tripod is usually left at home. Therefore, it was a pleasant surprise to discover how easy it can be to shoot multiples while rotating the camera by hand. Not all bodies offer this feature; however, my Canon 5D MarkIV will do up to 9.
Tech Tips – Standing stationary or with your camera positioned on a tripod, select and set your focus point on the element you wish to “twirl” around. It’s a good idea to take some single shots to fine tune and adjust your focus, depth-of field, and exposure to taste before engaging the multiple exposure feature. This is also a good way to obtain a solid source image if your camera doesn’t allow you to save all source images. If you have a choice of blend modes, start with “average” (Canon terminology), but experiment with others for various effects in different circumstances. Saving all source images then affords you the ability to reveal one or more in focus areas, such as the center of the water lilies, using layer masks in Photoshop.
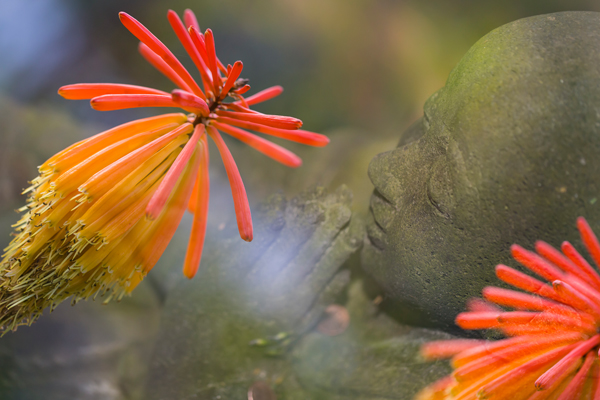
Another option is to combine two or more completely different images as in the Buddha statue at Kanapaha Botanical Gardens, which was shot first and then combined in camera with a red hot poker plant in the same garden. The primary caveat to doing multiples like this in camera is that you have to get it “right” in terms of placement since you’re relying on the shooting technique rather than post-processing. I should also mention that it requires a willingness to experiment and accept the fact that some combinations just don’t work.
Layer with Local Spice in Photoshop – This technique implores me to become familiar with the environment around my subjects in an effort to shoot more than simply portraits of flowers. It’s easy to grow myopic when shooting macro and forget to look around and take in the entire scene. After a long spell of honing my macro skills, I realized that I frequently left a garden or field without a single shot of the overall scene or any other interesting local features. Although textures can be downloaded at no cost or purchased, ensuring that I am the maker of everything that goes into my end result is paramount to me.
Layers can be broken down into three types: (1) color washes or blurs, (2) texture, such as bark, water, or rock, and (3) ornamental or artistic elements in the garden. I rarely shoot with a final vision in mind. A big part of my creative process takes place afterwards when I can glance at the RAW images side by side and look for potential in the combination of colors, curves, and light.
Tech Tips – Time spent in the creation of these types of images is heavily weighted toward post-processing. In Lightroom, I select a foundation image (containing the main subject) and all potential color wash textures then open them in survey view or set up a collection. To facilitate this process, I typically identify my textures with a single star to filter and peruse them. Once I’ve whittled it down, I’ll open all as layers in Photoshop. I like to stack the color wash texture layers above my main (background) image. After first cleaning up all blemishes and any distractions, I commence working with my textures by building a rough layer mask over the first texture layer to reveal my subject (I can refine it later) and copy it to all of the other candidates so I can toggle them on and off individually. At this stage, tools, such as free transform and layer characteristics, like blend mode and opacity, are some of the methods which offer glimpses into the way they might combine with the main image and also provide a hint as to whether two or more might play well together.
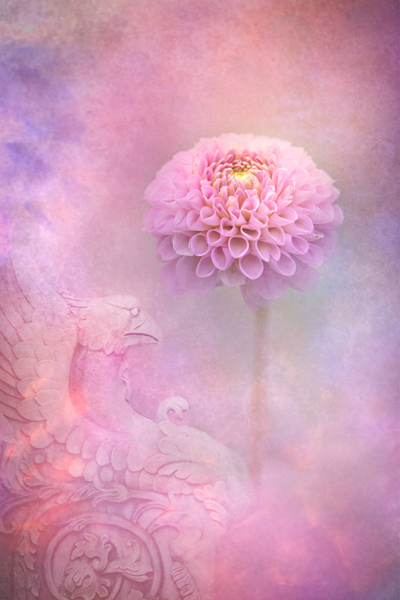
At this point, I begin to envision the final image. Introducing a feature layer, such as the gargoyle or stepping stone in the Japanese garden is the spice that infuses a unique sense of place. After incorporation of this element, or elements, I may add a “finishing” texture, perhaps one with a fine grain. Like a good stew, it’s helpful to step away and let it marinate before returning to assess the need for any additional edits to pull it all together, such as gradient layers, levels or curves adjustments, or vignetting.
Once you’ve mastered the fundamentals of floral photography, I guarantee you will eventually search for ways to make your images unique. A quest for creative growth certainly pushed me to discover avenues to boost the “richness” & meaning in my images. My next challenge will be adding the dimension of time; maybe life stages of a specific flower, seasonal variations, or perhaps layering bits and pieces from my own history. The possibilities are endless.
Let’s explore some of these techniques and more at Texas School 2020!
 Jackie Kramer is an instructor at Texas School 2020. She is known for her rich use of colors and fresh style in her floral photography. Her images have received international awards and have been published in several magazines, including the October ‘19 issue of Lenswork (#144). Jackie maintains an online group called Phlorography with over 6,000 floral photographers from around the world. She leads workshops where learning and fun are the foundation and is committed to enriching others through the medium of photography.


