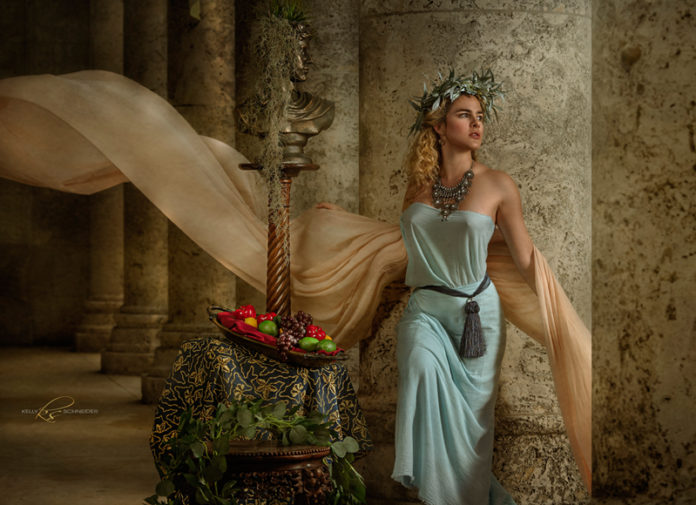
Three Fundamental Principles to Salient Images
by Kelly Schneider, Texas School Instructor
In its most basic form, a portrait is a representation of a living thing that captures some essence of the subject being represented. For humans, a portrait can be a glimpse into a secret window of some aspect of a subject’s deeper self. Throughout the history of portraiture, the most successful makers consistently produced images that “spoke” to the viewers. These portraits carried with them the ability to affect a pleasurable response that lasted far into the future.
Today’s portrait makers face the same fundamental challenges of those in the distant past. We must find ways to make our images “communicate” with the viewers. In the past, some portrait artisans did not do so well and upsetting a royal could result in jailtime or even death! Although we don’t face such harsh realities today, some of us still find portrait photography as sometimes treacherous and it can be a difficult journey. Our ability to consistently create powerful images is key to any successful portrait business.
“Portraits are the most intimate photographs. The image will survive the subject.”
Victor Skrebneski
According to the US Department of Labor, there are over 125 thousand “professional” photographers in America and over 44 million “practicing” photographers who create fun images with innovative technology that increases our challenge to compete for the ever-evasive portrait session dollar. Today’s smart phone cameras and applications are a testament to the constant advance in technology, giving everyone the capability to make cool and interesting portraits, fast and free. If we are to compete and WIN over clients that are willing to open their wallets and checkbooks, we MUST remain relevant. So, how do we do that?
Powerful “Salient” portraits are not images that generally just happen. Portraits that get viewers to stop and stare are usually the result of key elements that align with natural stimuli of the human cognitive process. They speak to us. Just take a stroll through the Old Masters portraits in any museum and you will be amazed at the impact these works still have on us. After hundreds of years, they are still amazing to us.

In statistics, there exist a “normal distribution” or average of most things. Most measurements across different variables and over time, fall within an average distribution. There are average heights, weights, foot sizes, leg lengths and so on for most living things. Designers try to build or develop things that meet the needs of the average people and can accommodate most of the average group. As in all professions, you can find people with below average skills, average skills, above average skills and GOD given talents!
In 1935, Guy T. Buswell, a professor of educational psychology at the University of Chicago, published a book entitled, “How People Look at Pictures: A Study of The Psychology of Perception in Art.” Since that study, there have been countless scientific studies on HOW humans look at visual stimuli (images, art, etc.). Understanding the visual attention patterns of people has verified HOW, WHY and WHAT causes humans to “see” in certain ways. Studies have been completed specifically using portraits to help understand the intense pleasure of the importance of the eyes in images or of recognizable human shapes.
As photographers, knowing the WHY, and HOW humans look at portraits can go a long way in helping us create images that we know will result in a predetermined positive response (or better scores!). We can learn to direct the viewer to “see” what we want them to see and thus respond to our image the way we intended. We can set our camera, lights, and editing to align to these KEY elements that will result in a much more powerful image that our clients and/or viewers will love. These key elements are called focal points or “eye magnets.” These salient areas are elements of the image that pulls the eye in ways that are predictable and based on scientific studies. Many of these eye magnets, such as light, are well known and understood. Others are more hidden but still important.
For portraits, the center of interest is that part of the image which attracts the mind and is usually the face or eyes. A focal point is that area of an image that attracts the eye, such as the brightest area of the frame. The center of interest (a human face, for example) in portraits acts as an “attention getter” and commands the viewer’s curiosity or mental concentration and is the part of the picture that we find naturally fascinating and want to know more about. Examples of centers of interest are eyes and faces, the human figure, animals, letters, numbers and symbols, and man-made objects. When we scan an image for the first time, our attention is naturally drawn to these items.
As opposed to the center of interest, a focal point acts as a kind of “eye magnet.” Strong tonal value contrast (light vs. dark) is the most powerful visual magnet as studies have proven. The viewer’s eye is naturally drawn to areas where light and dark are in stark juxtaposition. Bright colors, fine detail, sharp edges, anomalies, patterns and any arrow-like “pointers” also attract the eye. Any part of a picture that exhibits these features will make the viewer focus his gaze upon it. You have probably heard many times of judges saying that this spot or that area in an image “pulled their eye” away from the subject (usually reducing the score). What this means is that the center of interest lost intensity because a focal point was pulling the viewer’s gaze away.
An example of a focal point can be seen in the image (above) of the moon and beach. In the lower center right, there’s a lone circle (moon) that stands out from the rest… a light surrounded by dark blue. This little spot is strong “eye magnet” because it contrasts in value, color temperature, and size with its surroundings; the eye is naturally attracted to it.
Therein lies a critical foundation for powerful portraits: Powerful portraits have a clear center of interest and the focal points are the same. In other words, there should be one area that attracts both the eye and mind. To have an area in a picture that attracts your mind and another that attracts your eye is confusing and distracting to the viewer. Advertisers understand many people do not have long attention spans, hence they try to catch the eye of a user with a single glance. We, as photographic artists, can use this information and scientific evidence BEFORE the image is taken to do the same. For composition, intelligent and pleasing placement of focal points and center of interest has a significant positive affect on the overall enjoyment of the image. Creating focal points in your artwork is one way to be in control of how your artwork is viewed.
The THREE FUNDEMENTAL PRINCIPLES
The strongest focal point (eye magnet) in an image is Light. The lightest part of an image is what pulls the eye above all others. Using this critical element IS the key to powerful portraits. The majority of viewers will look at the lightest part of your images first (the strongest focal point). If this is NOT your center of interest, the overall strength of the image can be reduced.
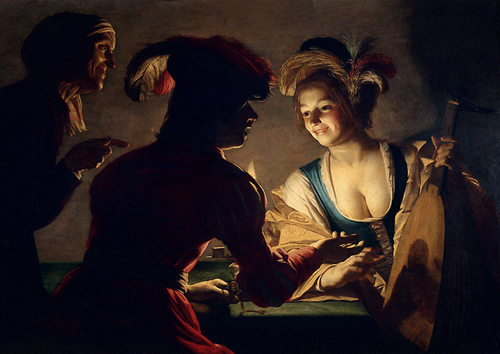
PRINCIPLE 1: The lightest area of your image should be the most important part of your center of interest (usually the face in portraits). The contrast in light between your center of interest (face) and the surrounding area of the frame is a measurement of contrast and thus “drama” (mood) in an image. Images that are taken with the primary subject (center of interest) being 20-40% lighter than the rest of the frame is a good rule of thumb to use.
Light meters, if you use one, are designed to be able to give you that info. The higher the delta (difference) between the light on the subject and the background is a measurement of drama (contrast). No matter what the main light source is, the result should be a lighter subject. For natural light, I always look for darker backgrounds and place the subject so that light reflected from them is lighter than that of the rest of the frame.
Also note that, the more contrast, the more eye-catching it can be… to a point. As in anything, we can all push the limits too far in contrast. But over time, artists find that wonderful balance for their own liking that makes up part of their style (like Caravagio paintings and his use of hard contrasts between light and shadow). Notice how Gerrit Van Honthorst pulls your eyes to the light and uses the hard shadows to give you a sense of time in the image below.
PRINCIPLE 2: Always get the CORRECT Exposure of the center of interest (the face in portraits). The human eye finds pleasure in correctly exposed subjects. Like life itself, we grow and develop as a human seeing billions of images that our minds process to ensure they are correctly exposed. We do not usually enjoy the far fringes of under or over exposure in our vision – especially as it relates to the human form. If exposure in a portrait is far under or overexposed, the viewer likely will find a different center of interest.
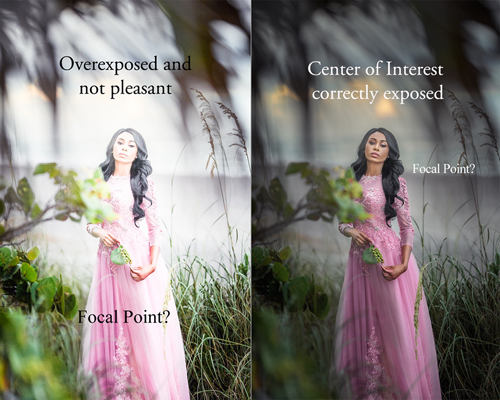
An example can be seen in the overexposed image (above) where the pink gown becomes the center of interest. We will reduce our eye sensitivity to see the person on a bright sunny day to ensure they look “correct” and increase our eye sensitivity to see them at night. We can change an image and thus it can cause an unpleasant feeling to the viewer when it is not correct. We can be OK with shadows and dark areas and even sometimes be OK with extremely bright areas (high key) as well. But the average viewer prefers correctly exposed faces! Using a meter or the cameras exposure meter to correctly expose the most important area of the subject is key and the skin of the face is usually the most critical.
PRINCIPLE 3: Well composed images have a natural and pleasant placement of the center of interest (and hopefully focal point too!). Objects that are placed in the center of the picture plane or near center will naturally become a focal point but that does not always make for great portraits. By placing an object or element off center, you can create a focal point through placement without affecting the aesthetics of the image. Effective use implied lines to direct a viewer’s eye to an object or element (known as convergence) or leading lines can have a powerful impact on an images impact.
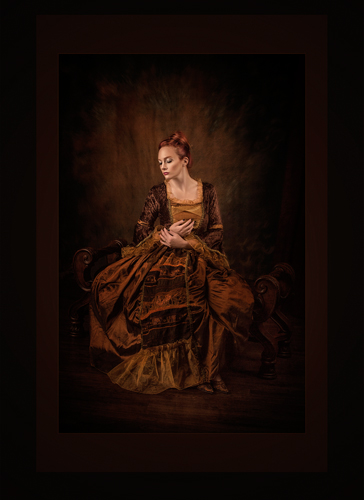 I always look at my viewfinder and I try not to press the shutter release until I feel that the resulting image looks “natural” and without visual chaos. When images with less than an ideal composition is viewed, it can cause confusion and chaos that negatively affects the power of the subject. Use of what “looks natural” is a good way the see good competition. There are hundreds of great references to use in studying great composition principles out there and learning this critical step in creating powerful portraits is one of the foundations of all great photographers.
Becoming “Brilliant on the Basics” of these principles, to me, is core to producing consistent powerful portraits. Yes, there are other factors that should also be in your photographic toolbox such as posing, light, texture, emotion, props, scene development, post editing, printing, and a huge array of others, but without these three principles, you never really get to the others. We know that the average human will gaze at a portrait in predictable ways, so it behooves us as visual artists to learn these behaviors and to develop a process to leverage them to make the most powerful portraits we can.
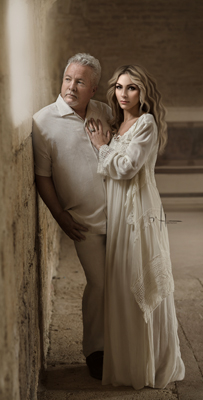 Kelly Schneider, M.Photog.Cr., CPP, has earned hundreds of awards in the PPA, WPPI, MPI, WPE, and state PPAs and other competitions internationally. He is married to the extremely talented Kalina Schneider who is also a PPA Master Photographer and Photographic Craftsman. Kelly also holds a Master’s degree in Human Development from the US Naval Post Graduate School and Kalina has a Master’s in Cultural Studies and Art History from one of the most respected universities in Poland. They will be teaching a course on “Powerful Portraits” at the 2022 Texas School of Professional Photography. This intense yet fun class is focused on the effective use of the core portrait photographer’s “toolbox” (camera, lens, light, props, posing, etc.). Learn more at TexasSchool.org.


