Blow Away the Senior Competition
by Conner Fuller
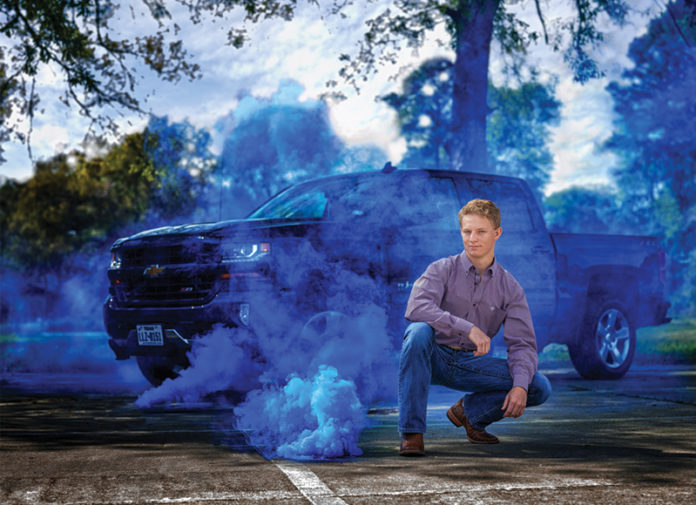
In the ever evolving landscape of portrait photography, high school seniors and their parents are demanding bigger and better, not only with their images, but their experience during the session. Several years ago, we stumbled onto a way to enrich that experience. One day I was thinking to myself, “I wish I had a cool way for someone to do a burn out without having their parents get mad at having to buy new tires” when it hit me. All I needed was a smoke machine! Unfortunately our $40 smoke machine from Guitar Center took ten minutes to warm up and had to be plugged in somewhere, so I needed an alternative. That’s when I discovered smoke grenades!
With a few Google searches and a potential government watch list, I finally found them… the Enola Gaye wire pull smoke grenades. They are made for paintball and other scenario type “games” but I knew they could work for my needs.
When our first batch of smoke grenades arrived, I was pretty eager to try them out. I had, of course, done research about them and I was very excited. They have a burn time of about 60 seconds and produce a LOT of smoke with a rich, saturated color.

So here’s my list of everything you will need for your smoke grenade shoot and how to best manage the short time you have with them to achieve the best possible shots:
1. Plan Ahead – You can’t always plan days in advance, but you need to have a plan before you ever pull that wire to start the smoke up. My personal rule of thumb is to have three poses planned and practiced with the subject so that they know which pose to do when I yell out the number. Lighting and camera needs to be set before we say “go.”
2. Use Off Camera Flash – The flash is going to give “life” to the smoke. In certain places, it will come through and in others it will simply add a little saturation. Bonus tip: The flash gives your model a “target” to point their nose to in case you decide to move around.
3. Get an Extra Set of Hands – Super windy days are tough when it comes to smoke. It can be very challenging. Also, you don’t want to leave the grenades on the ground because they will stain the ground with whatever color smoke they emit. So, get the kids’ parents or even an assistant (if you’re lucky enough to have one) to literally run around the subject with the smoke or stand upwind and let the wind bring it into the frame. Hold the grenade towards the bottom because the top where the ignition happens gets very warm.
The biggest problem I see with smoke grenade sessions from different photographers is their lack of planning. These things aren’t cheap, so don’t burn up all your time on a single pose. Plan ahead and make sure you are setting yourself up for success.
Final bonus tip: If you are using the wire-pull smoke grenades, keep in mind that they get very hot and there is a certain way to pull the wire.
You should pull the wire perpendicular to the grenade. Otherwise, it may not ignite. Also, as it burns down, it can throw off an occasional spark and the tube itself can get hot. So, make sure you have a safe place to throw it away when you’re done with it. I like to keep a bucket of water outside at the studio to toss it in for a couple hours before throwing it in the trash.
Now that we’ve covered the basic tips, let’s move on to some more advanced tips… the main one being posing!
Posing is tricky no matter what you’re photographing. But for smoke grenades, you want to make sure that you not only have three unique poses in a matter of 60 seconds, but that they are easy enough for your subject to do and for you to tweak with simple verbal commands. I really like to have three different “levels,” so to speak. I want them to stand, squat, and sit if possible. What this is going to do is to keep them from getting bored when viewing the images later. The goal is to not only enhance their portrait experience, but also to create a bigger sale. Showing seven images of the same pose can become an issue in the sales room.
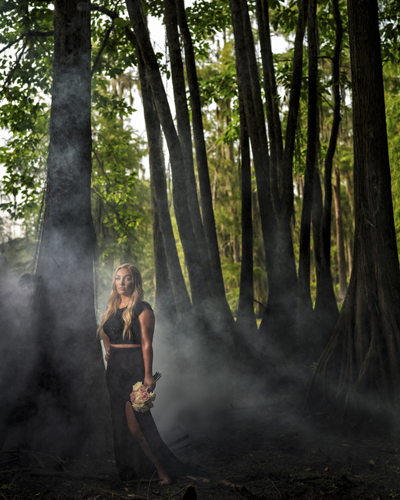
The objective is to create a dynamic pose. Something that shows movement or that lets them be “fierce” works best, rather than just standing there doing nothing. Remember, these are smoke grenades.
They aren’t your typical portrait, so don’t let your posing kill this awesome opportunity to create something really stunning!
Lighting, just like any other portrait, can make or break your image. Make sure that your lighting is being used to enhance the image. If you’re going for dark and moody, make sure your lighting is helping. I personally prefer to use a beauty dish with a grid to provide a little more control of the light. If you’re using something like the MoLight AD200 with a grid on it as a kicker light, it really helps the smoke to pop. Since you may not have that option, until you grab your “AD200 on location kit” from MoLight, just make do with what you’ve got.
Since we’re on the subject of making do with what you’ve got, let’s talk about how zip ties and umbrellas work with the smoke. Frankly, they’re awesome! You can zip tie one of the “micro” grenades onto the umbrella and let the smoke pour into the canopy and billow out the edges, creating a truly awesome shot! The things you need to remember is that you will need to use Photoshop to take out the zip tie. Also, the smoke will possibly stain the umbrella. So, I like to keep one in my truck with me at all times that I don’t mind using for that purpose. Just don’t try to take it through an airport because it does smell like burnt gunpowder for quite a while after.
Let’s have a quick reminder of the major points (or an overlook for all of you who didn’t read the whole article… I know who you are!) First of all, plan ahead and use off-camera flash. An extra set of hands is essential. Observe posing dynamics and light with purpose.
If you follow these simple steps you will be setting yourself up for success when you start using smoke grenades!
Also, as a bonus tip: Get the senior’s mom or friend or whoever is with them to video the event. Then, post it to social media. When your seniors ask how long it took you to add the smoke in Photoshop you can say, “Nah we don’t have to, it’s a real smoke grenade.” Since the experience for seniors is so very important, this will help you book that session!
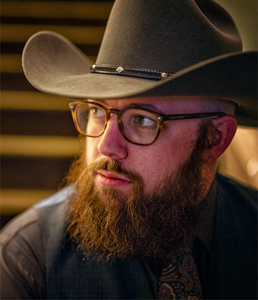
 Conner Fuller, of Kirbyville, Texas, became a photographer at age 19 when his mother needed a second photographer at her studio. His competitive drive hurled him towards earning his CPP, Photographic Craftsman, and Master of Photography by the time he was 30 and he eventually purchased his mother’s studio. He loves sharing his knowledge with other photographers and hopes to be able to help others after so many photographers helped him.


