


Although I have been using OCF (off-camera flash) for many years, there was a time in the beginning of my career that it terrified me. I had no idea what it could offer my images, had no training, and very little budget to purchase gear. About year five of my career, I finally got frustrated enough that I couldn’t produce those dark dramatic clouds or light a reception room they way I had seen others do. I knew it was time to learn the “f” word. This is year 14 and I wouldn’t shoot without it on a portrait session and definitely not on a wedding day. It has truly helped to define my bold color/dramatic lighting style that I now teach around the world.
Think about drawing with light as a painter would, visualizing the final scene in your mind. Work backwards to create it, adding OCF where needed to highlight the areas you want the viewer to see first. Diagnosing the quality, quantity, and color of the ambient light is key to knowing if you need to add or subtract from the scene. If you know how to control your exposure, you can “drown out” a scene and then use OCF to paint back and create what your mind sees. What do the shadows have to offer you? What color is the existing light or what do you want to change it to? Is the light punchy and harsh enough for your vision or perhaps you’re imagining something softer and sweeter. A lot of people don’t realize that flash exposure and ambient exposure are separate manual settings you’ll dial in but in the end, they merge together to create your final vision.
I prefer to walk the scene and diagnose it first. One of the techniques you’ll often see me do is raise my hand and look at the way the light, shadows, and color falls on both sides (palm and back of hand). Then, I think about what needs to be done to modify the light to match my vision. I think about how I will compose the image. What angle will I shoot from? What lens to use? I typically find the ambient light exposure first. If I have an assistant with me, I will ask them to stand in as I proceed through my steps. Once you have these basic steps down, OCF can be seen as a creative and a corrective tool. Following are a few ideas to share with you to freshen up your OCF.
Idea 1 – Rim lighting with the addition of water or fog: The image of the golfer (above) screams “Alison Carlino!” I love the drama of a backlit image using anything that can give me water… sprinklers, spray bottles, fountains, and of course, real rain. Add a fog machine and a colored gel and you’ve got major social media traffic talking about you. I place the flash about 6 to 8 feet behind the subject and use their bodies to block the light head. If your subjects move, you’ll likely experience flare back into your lens (which could work too). Water images aren’t just done at night; I find fountains often on engagement or portrait shoots and when flash is added, it produces an extra layer of separation. Be sure to use your flash’s zoom feature or a grid to control the spill of light on the scene. Want to separate yourself from the natural light shooters? Backlighting a subject and adding water or fog is one way to do it.
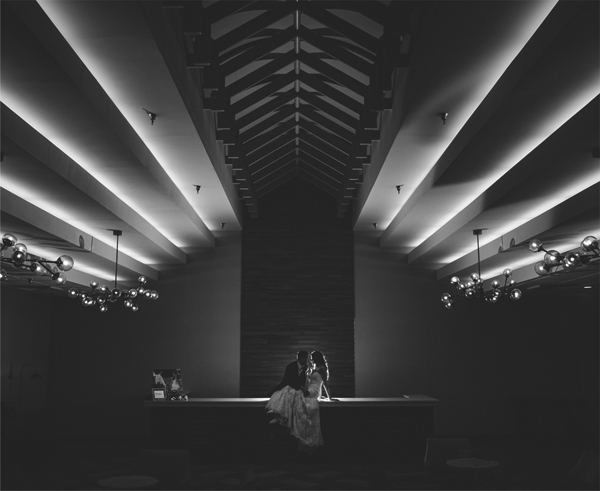
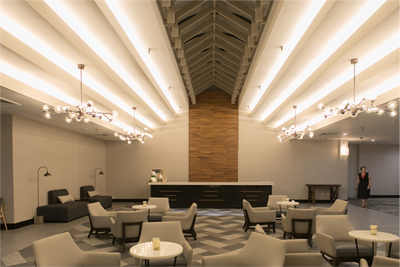 Idea 2 – Drowning out a scene: As is typical on a wedding day, I walk into a lot of rooms with nasty lighting. Using max sync settings on your camera, you can take the overall light level down to nothing and then add back flash to “paint” the light in where you want it. For example, if it’s raining on the wedding night and you need to create dramatic portraits of the couple, you can use any room in their venue to create something more romantic and dramatic. When your shutter speed is set to max sync, your ISO is at its lowest value, and your aperture is closed down, you will have a dark image! This allows you to then pop the flashes or continuous lighting sources on like light switches, painting in what your mind sees. Just be sure to grab an umbrella and make that backlit rain image happen too!
Idea 3 – Using color to your advantage: Whether it’s white balance settings that you change in camera or gels that you add to your flash, color has so many possibilities. Rogue is my supplier of choice for gels. I use ½ and full CTO gels to correct very warm colored venues but I also use them when I want to increase the volume of blue. If you set your in camera Kelvin temperature to correct for the warmness and also place a CTO gel on the flash, you can control exactly how “cool” your scene will become. If you like the orange hot spot behind your couple, place a full CTO on your speedlight, turn it towards the wall behind them, and change your white balance to the tungsten light bulb. Be sure to control the angle of the flash 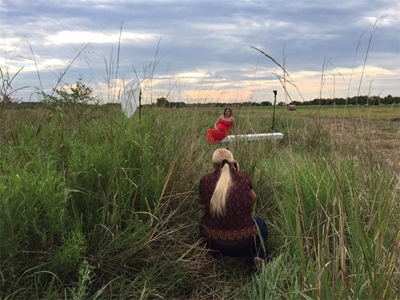 by zooming the flash to 105mm or using a honeycomb grid. You’ll have a cool colored scene except for where the flash hits the wall. The couple will be in silhouette so be sure to pose them where there is space between the bodies and noses. Use the theatrical gel colors on a wedding day or even on a high school senior sports session to match the bride’s color scheme or the school’s colors.
Idea 4 – Shutter drag with subjects frozen: Although it’s somewhat hard to wrap your mind around this (images below), you can handhold the camera at slower shutter speeds and still get a frozen image of your couple because flash saves the day!
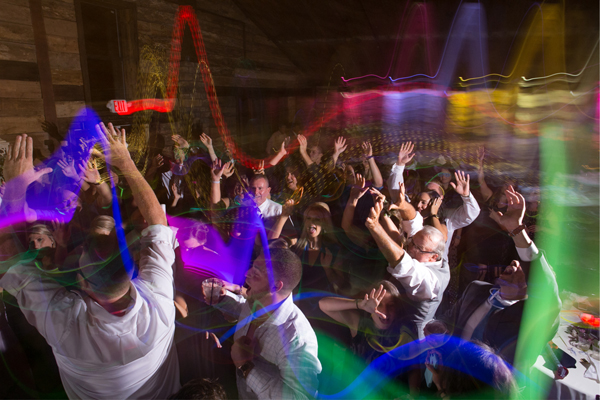 When glow sticks enter the dance floor, I slow down my shutter speed to a 20th of a sec and let the flash fire directly on the subjects at a low power to freeze the people twirling them in front of me.
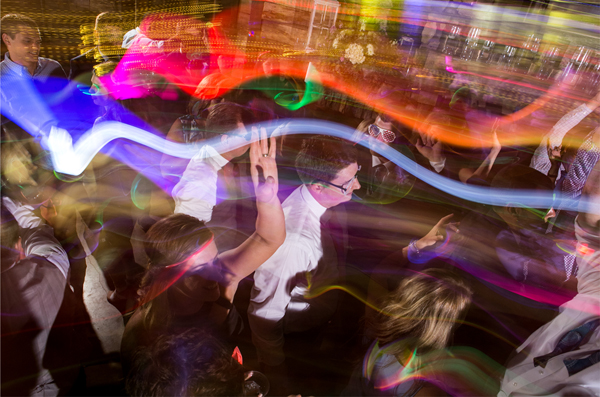 Their faces are in focus but the motion of the glow sticks adds to the excitement of the party scene. You can also set the camera to rear curtain sync and let the flash fire at the end of the exposure to freeze the action in front of you.
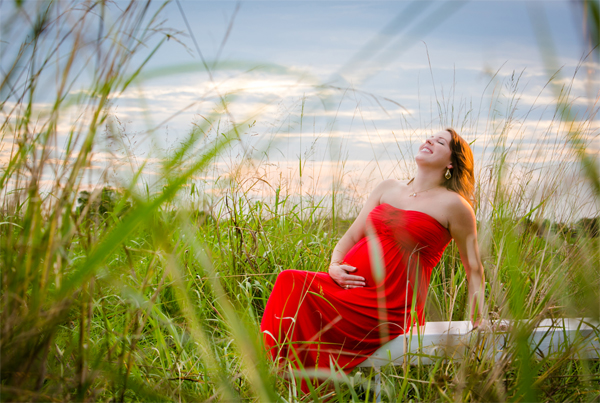
Idea 5 – Finding a creeper viewpoint: Sounds strange, I know, but framing up your subject using surroundings that tell the story and pumping the flash in while you stand outside the scene is great way to draw the viewer’s eye straight to what you want them to look at. It really does help to have an assistant here because you might be far away and need the stand moved. Recently, I had an outdoor senior session near sunset. I walked her property and identified the areas where the sun could work as the backlight. I then placed the girl in poses she could handle, set up the flash in my triangle lighting pattern (45 degrees left or right from the subject), and then positioned myself where a metal bar created a triangle around her face. It feels like you are a creeper in the grass but you do what it takes to get the shot!
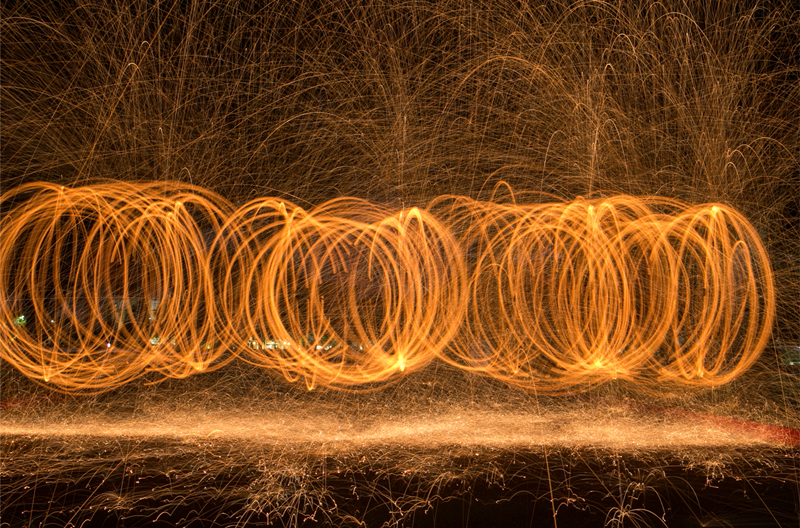 Idea 6 – Spinning fire: If you’ve never gone to Home Depot and bought steel wool (grade 0000) with the intention of lighting it on fire in the name of great imagery, you just haven’t lived. I have taught this technique in a couple of my workshops through the years and last year, finally had a venue out in the country that would allow me to spin at the end of the wedding night. This technique (and most of the above ones) will be taught during my weeklong class at Texas School in April 2021. I hope you’ll join me and take your OCF to the next level!

Alison Carlino will be teaching a class at the 2021 Texas School of Professional Photography.
Alison Carlino has 17 years in the industry and has seen the trends come/go. In this class, you will learn lighting off camera, modern posing, and the collections/products that have made her senior portrait & sports business wildly successful. Expect very little lecture and a lot of hands on.


