


by Alison Carlino, Texas School Instructor
Enchanted Rock is a huge pink granite dome that rises 425 feet above Big Sandy Creek near Fredericksburg, Texas. It was only recently that it became a designated National Natural Landmark, but was already well known as “enchanted” since the early 1800’s. The Tonkawa Indians considered the dome to be haunted by spirits revealed in the sounds of creaking and groaning caused by natural heating and cooling of the rock. Many legends and historic happenings continue to be highlighted in lore and literature.
This was the setting for a two-day workshop in July of 2019. Ten students and I cooked meals together and slept under the same roof in a massive restored home. The B&B was only five minutes from Enchanted Rock with open access to wildlife, beautiful portrait areas with backlight in the evening, and open ranch land which was perfect for photographing the Milky Way during the new moon. Our purpose was to learn the fine points of off-camera flash and posing skills. We were fortunate enough to have several models that endured the Texas summer heat like champs.

Day one began on the B&B grounds with identification of strobes, speed lights, and modifiers. From there, we quickly moved into identifying the existing light as the most important factor when choosing the location. Whenever evaluating a new location, whether it be indoors or outdoors, I put my hand up in the air and observe the highlights, shadows, direction, and color of the light hitting the back and front sides and visualize that lighting on someone’s face.
In a harsh lighting situation such as full sun in midday, I know that strobes will bring the power and help me “hold the skies.” A “go to” starting exposure would be ISO 100 or ISO 200, f14 or f16, and the maximum sync speed of 1/200 second. I like to under expose the scene and then fill the subject with flash with a power setting of 1/4 with the strobe fairly close to the subjects. The height of the light is placed where the center of the softbox is about level with the subject’s forehead, producing catch lights that extend between 11:00 and 1:00 positions in the eyes. Also, the back of the box should line up with the subject’s back shoulder so that the light wraps around the person’s front to opposite side. The shape and size of the softbox helps shape the light falling on the subjects.
Speedlights are an important part of my location equipment. For an indoor setting such as an infant’s nursery, speedlights leave far less of a footprint and are often the only lights that can actually fit in a small space. Sometimes a strobe is simply too much light, even when turned down to the lowest setting. In most cases, I will turn off all ceiling lights and lamps and open the blinds first to see what kind of light will flood the room and where I need to add more light into the setting. But, for Enchanted Rock, we would explore some other alternatives.
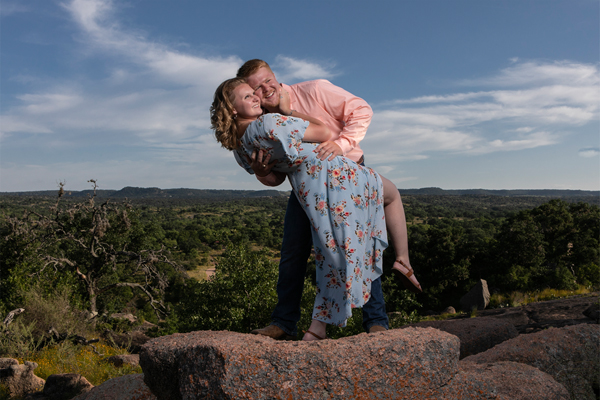
Our models gave everyone a chance to practice some posing techniques. Students were taught to start from the toe and finish at the head. By turning the female 45 degrees to the camera, pointing the toe closest to the camera, and bending the knee, you create an “S” curve that is pleasing to most body shapes. From that point, if it’s a joint, bend it. Then place hands on the hips, hold hair or jewelry, or use them to connect to another person. Turning her chin towards the lower shoulder really drives home the look of a polished pose.
For guys, I will have them separate their feet in a relaxed stance, give their hands something to do, and place their shoulders a bit more square to the camera. This gives the male subject a place of power in the image, something I would not necessarily do for a female. For both genders, shoulders back and leaning in towards camera places their forehead over their toes and puts the head in the right perspective to the camera so that nothing is stretched or out of proportion.
Later that afternoon, we were ready to move over to Enchanted Rock State Park. Texas summer heat is no joke and we knew there would be very little shade at this park but fortunately all of us were Texans and pretty acclimated to the brutal climate. We were so blessed to have a blue sky day with a few puffy white clouds and no rain in sight. Our first shooting location in the park involved large boulders, an open grass field, and a small stream with rocky trails. All of the models and I had previously discussed clothing styles and colors. The time was about 3:00 pm which produced a low enough rim light angle on the hair and body. Backlighting with the sun and filling the face with flash is my favorite lighting style!
In the grass field, we had a high quantity of sun, harsh lighting, white to mid day colored light, and the direction was slightly behind the head coming from the top. Students posed the model and positioned the flash height so that the catch lights would appear in the correct areas of the eyes.
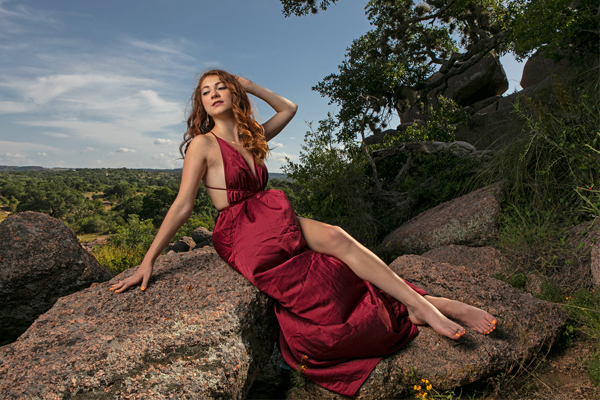
 After a break, the group headed to the base of Enchanted Rock for the final images to be captured at sunset. This required hiking uphill and over boulders, carrying our cameras, lenses, light stands, and flash gear. The goal was not to make it all the way to the top but to the level just below it for a clear view of the hill country below. Earlier in the year, I had photographed engagements at this very spot and knew there would be a bit of a breeze as we climbed higher, especially near sunset. I had also arranged to have one of the models arrive with a long, flowing dress to match the mood and scene of the location.
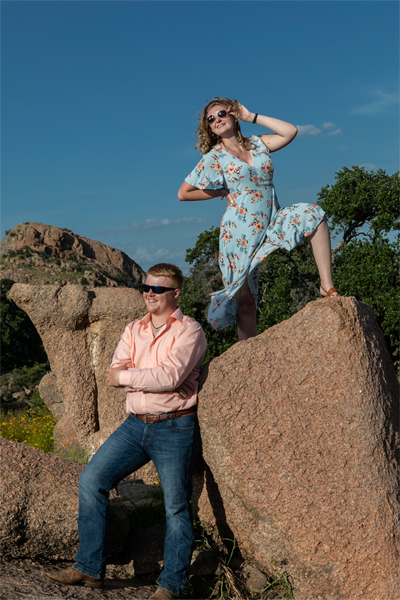
To create an epic image, we found a large boulder that provided an important compositional element of depth of field. A visual interest can be created by including a foreground, mid-ground, and background in an image. When our model got on the top of the boulder, we had her face into the sun and pose fashionably with sunglasses. Because the flash was so well balanced with the available light, it is difficult to realize that flash was actually used in the image. The lesson here is to pack plenty of power. Speedlights won’t do the job alone. You need a strobe.
After a long and hot day, it was time for dinner and a discussion of Astro Photography. Everyone brought tripods, wide-angle lenses, head lamps, flashlights, and courage to go off into the wilderness in the dark of night. March through October is Milky Way season in this hemisphere, which means it is more visible during those months. This workshop was scheduled around the new moon phase so the skies would be dark. You can still photograph Astro two days before and two days after the new moon, however. Clouds can be disappointing, so it is important to watch the weather forecast. We had a few passing clouds during the first hour, so we moved to a second location to light paint an old barn in hopes of getting clear skies eventually.
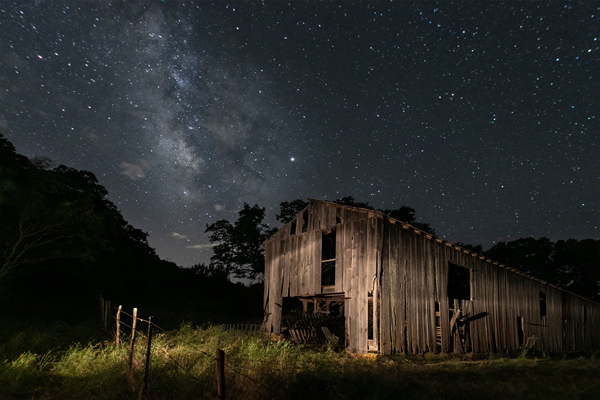
Enchanted Rock State Park is in a dark zone and, while it is not as dark as Big Bend National Park or places further west, we did get to see quite a few stars and the core. For such images, I turn on my long exposure noise reduction for Milky Way images but I turn it off for star trails. In addition, it is helpful to turn down the LCD screen light to the lowest 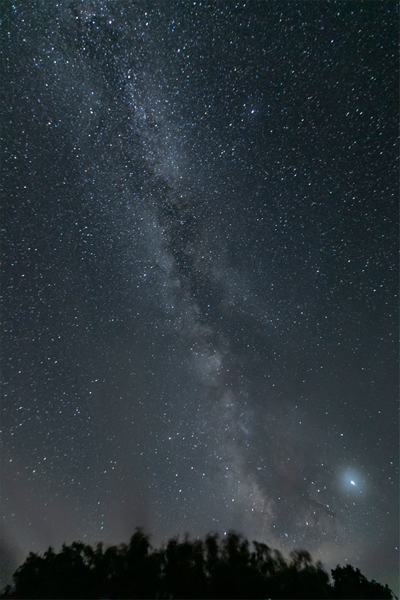 setting. Most Milky Way images I’ve taken are at 2.8 using 20 to 25 whole seconds with a starting ISO of 4000. Another personal preference is to change the white balance to 3800 to 4400 Kelvin. My Canon 5D Mark IV has a built in intervalometer and in combination with the bulb setting, I can leave the shutter open all night long to truly capture a revolution of the Earth.
By 1:30 am, it was time to head back to the B&B. Surprisingly enough, the location right off our front porch proved to be the most clear and star-filled sky we had seen all night. As the first images began popping up on the backs of cameras, everyone was overjoyed and realized the power of long exposure capture. There is nothing like your first “keeper” Milky Way image!
So much learning happened along with new friendships from our small group that I am highly considering another adventure workshop for 2020!
 Alison Carlino, Cr. Photog., CPP, is from Richmond, Texas. She will be teaching a class on “High School Seniors from Portraits to Sports” with an emphasis on lighting, posing, and marketing at the 2021 Texas School of Professional Photography.
In this class, you will learn lighting off camera, modern posing, and the collections/products that have made her senior portrait & sports business wildly successful. Expect very little lecture and a lot of hands on.


