


by Bob Coates
Texas School Instructor
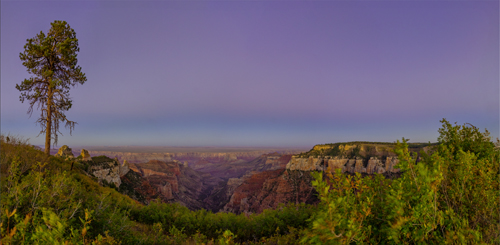
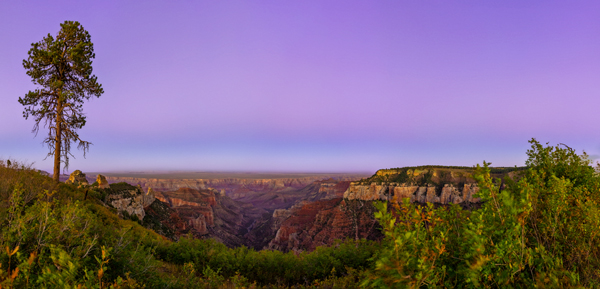
When I proposed the processing of this image for a tutorial one of the comments was, “…there’s also a lot of blur in the foreground which will take a lot of work to clean up if possible. It would be interesting to see how you would overcome these issues.” As I worked on the files I realized that the blur in the foreground was caused by the strong wind blowing the greenery it was a part of the story and scene. Not every part of an image has to be absolutely perfect. There are still a lot of lessons to be learned from this slightly less than stellar image.
The first lesson would be to not rush, as I was, when taken by a scene. I was enamored with the sky, lone tree, canyon. My intention was to frame the scene and did not take into account the blowing wind’s effects. My focus was tuned to getting a larger file using a double row panorama. Onward.
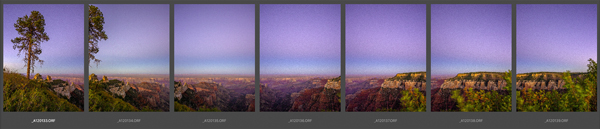
Panorama capture – There are a couple of reasons to create a panorama view image. One is esthetic. The panorama format is more the view your eye sees a landscape. It can be more representative, and at the same time, an artistic vision of a scene. Another is practical. I like the light weight and lower price of micro four thirds camera format but that gives me a smaller sensor. When I want to have more pixels a panoramic capture is the way to go. I call it the poor mans large format.
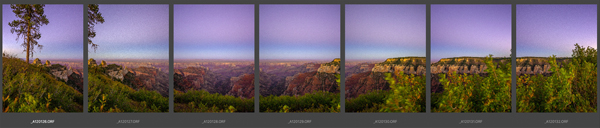
Ideally when making photos for a panorama you want to overlap each frame by about 30% to 50%. The greater the overlap the easier it is for your software to blend multiple images to your final output. You can also make your file even larger by making a second pass with the camera tilted upward. I won’t go into deep detail here but, ideally, you will want to set up your camera so the lens pivot is over the point where the light enters the lens. You’ll see when I process this image that extra post processing work has to be done to correct some of the curvature created by mounting the camera a bit forward of the nodal point. A level camera is also important.
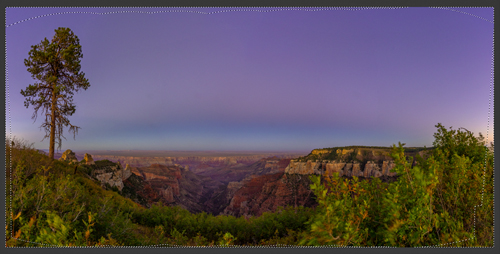
The Scene – This Grand Canyon view jumped into my sight as I rounded a corner while heading back to camp. After a long day of travel, hiking and shooting, this sky made me pull over and race to grab my gear. Not having time to get out and set up the panorama head I did the best I could to get the lens close to the nodal point.
Having the Fotopro Eagle E6L tripod with the Quick Level head was a big help. Leveling the camera was a snap and click stops on the head made overlapping frames consistent. If there is time I always make multiple passes of the scene. I recommend always photographing from left to right as it shows the images in order in the viewer window after they are downloaded.
Exposure – Sunset shooting can lead to underexposure of your darker areas. I try to expose to push the sky brightness as far as I can without loosing any color channel information. If your camera has a Histogram make sure it is active and push the information to the right.
Shoot in RAW if possible. The info shown on your Histogram is reflecting the jpeg your camera is producing so you probably have more info even when pressed to the edge. Test your camera to see how far you can go. This is known as ETTR (Expose To The Right). Experience has shown I can bring back sky color in post whereas bringing up detail from underexposed areas adds unwanted noise.
First stop for me is Adobe Camera Raw. A general correction to bring the files closer to the actual scene is performed. Bring down highlights and open up shadows. Tweak overall exposure, color, etc… for one of the files. Highlight that file and shift click the last file to select all files and Synchronize settings.
Click the “Done” button verses opening the individual files. The settings will be applied to the files as they open in the next step.
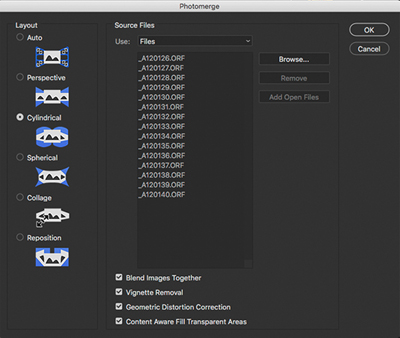
In Adobe Bridge highlight all files for your panorama, including the second row. From the Menu Bar select Tools>Photomerge.
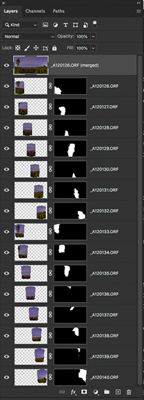
Photoshop blends the images together using masks. Before you flatten the image check along all lines of the mask to make sure the blending doesn’t need any tweaks. Turn on and off layers to check. You can also turn on or off the mask by shift clicking on the layer. You can just click on the mask to activate it again.
You can also see the mask in full size by Option/Alt Click on the mask. Return to regular view with the same Option/Alt Click on mask again.
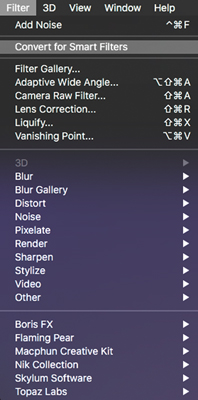
One way to convert a Layer into a Smart Object is to access the Filter Menu. Filter>Convert for Smart Filters.
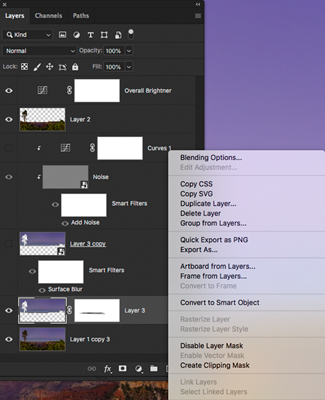
Cntl/Right Click on a Layer. On the Menu select Convert to Smart Object
Processing after Adobe Camera RAW – First stop was to get the sky straight. A section of the center sky was selected and put on its own Layer. That selection was dragged to the side and the Mode was changed to Darken.
The Layer was copied CMD/Cntrl > J and flipped with Free Transform and moved to the opposite side of the sky.
When you have a sky where the colors are this smooth working on it can introduce banding. Best practice is to open and work the file in 16 bit as there is a lot more color information with which to work. If you find you are still showing some banding despite being in 16 bit there is a little more work to do.
I selected the sky and placed it on its own layer. Convert the Layer to a Smart Object so settings can be massaged even after accepting them. You can do that by Crtl Click (Mac) or Right Click on the Layer to invoke a dialog box that shows Convert to Smart Object. Shortcuts not your thing? Go to Filter>Convert for Smart Filters.
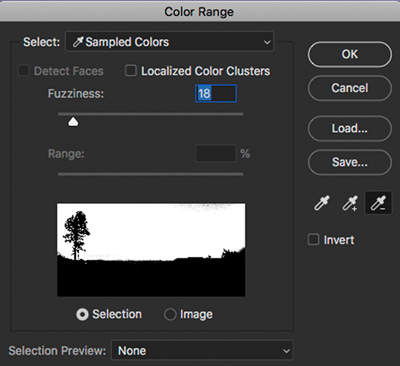
When using Color Range under the Select menu (above), choose Sampled Colors. Click the + eyedropper and add to the colors you are choosing. The selection can be tweaked by using the Fuzziness Slider.
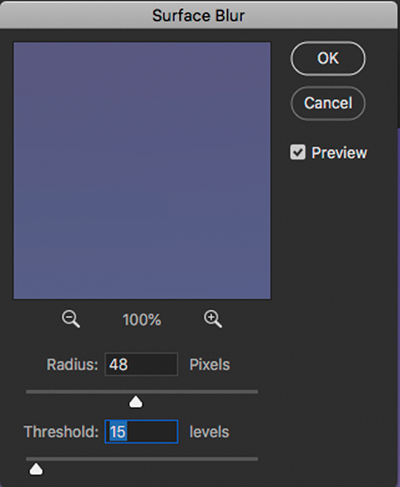
With the sky Layer selected go to Filter>Blur>Surface Blur. Settings are dependent upon image file size. In this case Radius was set to 48 and Threshold to 15.
You will want to work on this by eye. This should take care of the issue. If there is still a little banding the rest can be taken care of with the addition of a little Noise.
Create a New Layer. Shift/Cmnd/Crtl ’N’. In the New Layer dialog tic the box Use Previous Layer to Create Clipping Mask.
Choose Overlay Mode and choose Fill with Overlay-neutral Color (50% gray).
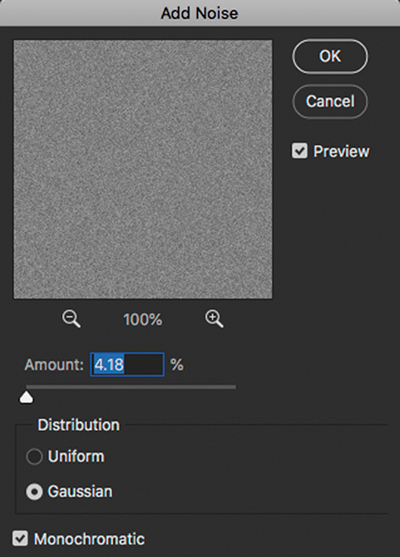
Then Filter Noise>Add Noise. Set Monochromatic and play with distribution. Depending upon the banding either Uniform or Gaussian may work better. Add as little Noise as possible to remove the final banding. After adding noise you may want to add just a tiny bit of Gaussian Blur with a setting of about .8 to lessen final banding.
Final Tweaks – I merged all layers into one with the shortcut shft>Cmnd/Crtl>Opt/Alt > ‘E’ Have you curser at the top of the Layer stack before pushing all the keys at once. I then made a Marquee selection including the canyon and exported it to Luminar 4 for some selective sharpening, Orton Effect and Glow.
When the result was retuned I added a black mask. Painting on the mask with white at a 50% opacity I was able to selectively get the result I was looking for in the canyon portion of the image.
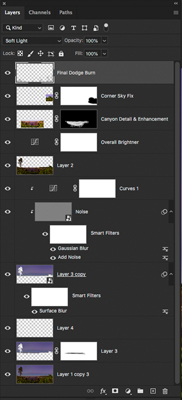
The canyon needed some extra love and attention. Especially in an image such as this, additional depth and dimension can be added by dodging and burning. Darkening shadow areas just a bit while lighting slightly brighter areas makes the image feel stronger. I use a Layer set to Soft Light. Set the brush at 5-10% opacity while gently painting with black and white.
As seen in the title image at the beginning of the article, I stayed realistic in this process. For my art clients I would probably enhance the sky with some birds in the distance on the right side of the sky to balance the tree.
The result of these merged files turned into an almost 13,000 X 6,400 pixel image. That equates to a 21×43 inch image at 300 DPI. When printing to canvas this photo can easily be printed 42×86 without upsizing the file. Even if you cropped it to a 20×30 inch image, there is still plenty of information in that file to make a great image.
 Bob Coates, M.Photog.M.Artist.Cr., CPP, EA-ASP, is from Sedona, Arizona. He has been a successful photographer for well over 20 years working on various genres including weddings and portraiture. Concentrating fully now on Commercial and Fine Art Photography, he teaches a class on “Nature, Macro, Floral, Animal, Landscape and Travel Photography” at the 2021 Texas School of Professional Photography.


