


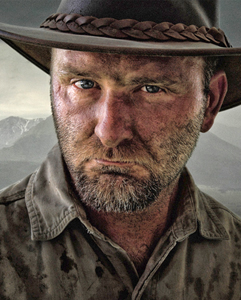
by Carl Caylor
Texas School Instructor
There was a time when I spent many hours in the dark or under a red light creating custom prints for some of the most talented photographers in the nation. Black and white as well as color work was an art in and of itself. I refined skills of burning and dodging, creating contrast and correcting color on the fly. It was a very elite skillset. Fast forward to the digital world. Here we are with unlimited opportunities for anyone to do what I did in the dark but with much more precision and control. It just seems that, like with anything that technology has made easier, maybe we would be better able to use the technology if we understood where the technology came from and some of the ways it was used in the past.
The very first concept is the RAW file. When digital first came on the scene and entered the professional world, I was still working in a pro lab. Folks from Kodak stopped in for a demonstration and training on how to work with the new age of photography. After one of them began explaining the RAW file concept, I said out loud, “It’s a negative.” He looked at me strange and said, “No. It’s a digital file.” Obviously, he never worked in a darkroom before. The RAW file contains information in exposure, color, and more in a range beyond that from which it was exposed. In a RAW software, that information can be altered after the creation was made as if it were being changed while creating the image. If I exposed for 1/125 of a second at f-5.6 on 400 ISO in camera, but realized later than it was overexposed, the RAW file and software can work together to make the correction to that exposure.
Film worked the same. We shined a light through the film for a length of time to create an image. More time or more intense light would make the print darker, and less light would make it lighter. The negative had an enormous amount of information on it when exposed correctly. With darkroom techniques, that information could even stretch beyond normal capabilities as Ansel Adams discovered with the Zone System. The fun part of making a “custom print” in the darkroom was that we didn’t need to settle for a constant exposure throughout the scene. We could pick and choose areas to make darker (burn) or areas to keep lighter (dodge) to make a vision more like what our eyes saw. There are many other more advanced tricks from my darkroom days, but in this article, I will share the correct way to dodge and burn in our digital world and hopefully help you create stronger images.
First, you need to capture in RAW. Then choose a RAW conversion software. Many folks like Lightroom and that will work just fine. I have used Kodak’s DPP when I created with their camera. I used Canon Digital Photo Professional (DPP) when I worked with the Canon system. I did this because their software was written in conjunction with their camera files and Lightroom, as good as it is, is still a third-party software in relation. Lightroom has many more bells and whistles than both the Canon and Kodak software (now obsolete), but the files did process a little cleaner with the native system. If you use Nikon, I always suggested Lightroom as their software was not great in my opinion. I have been creating with Sony for many years now and moved to a dedicated RAW conversion software, Capture One. It has since encompassed all brand formats and has been a game changer for my work. Whichever software you choose to use, the concept will be the same.
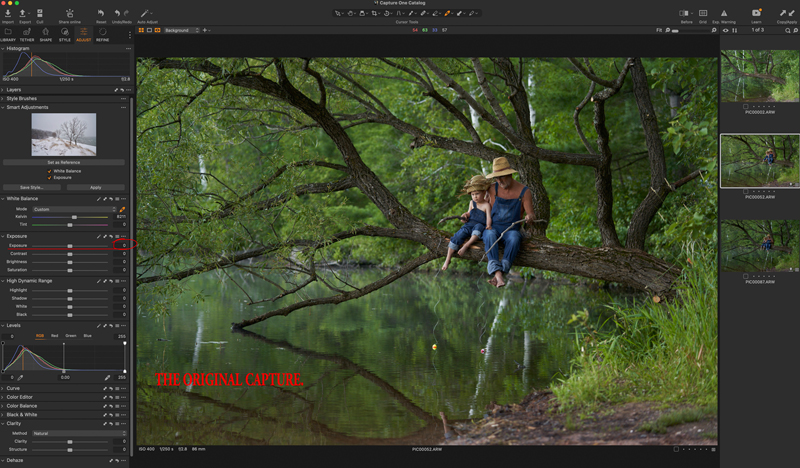
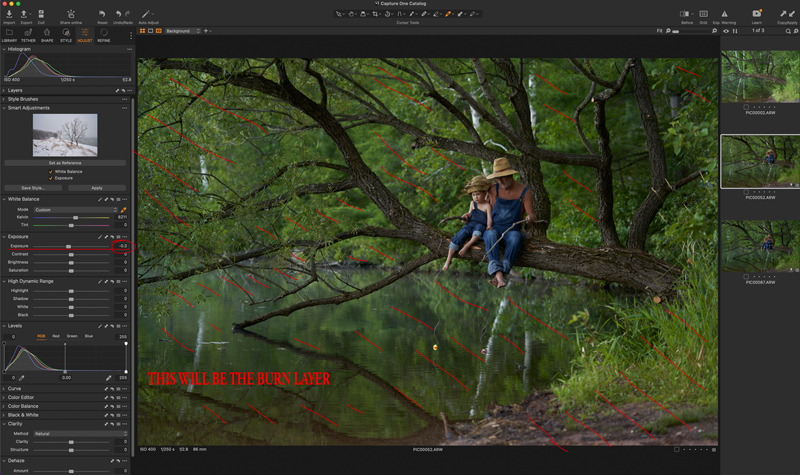
Hopefully, you captured the original image correctly, meaning your exposure was correct for the given scene. My workflow for burning and dodging an image is simple. I tweak the exposure slightly if needed, then export it to a 16 bit tiff file (ex: Smith 001) to a folder on my desktop. I then decide what I want to burn and how much. I use the exposure slider to increase the exposure to my liking, then export that file as a 16-bit tiff file (Smith 001B) to the same folder. I may want some areas even darker. If so, I slide further and export again (Smith 001BB). Then I decide on areas I may want to see lighter. I slide the exposure to make those areas where I want them to be and export the file or files to the same folder (Smith 001D).
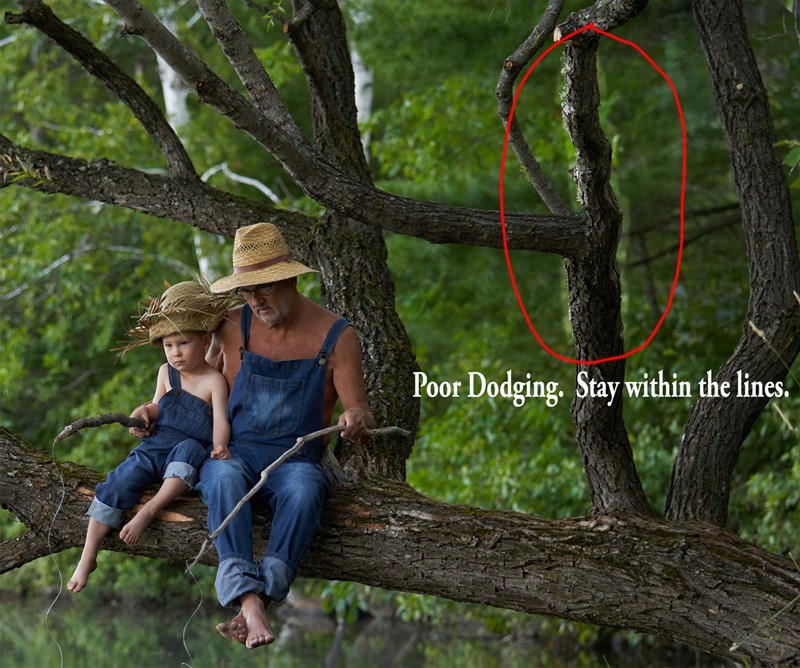
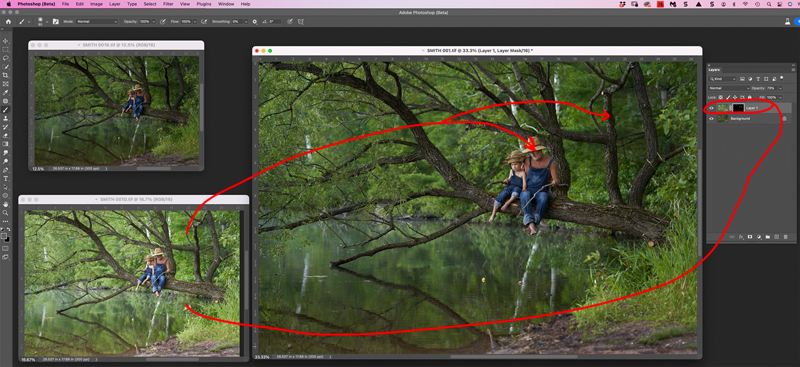
Now I have a few files of the same image but with different exposure values all in a folder on my desktop. After this, all of the files are opened in Photoshop, beginning with my original, or slightly tweaked, file. That is my base exposure. I usually burn first. To do this: click on the (Smith 001B) file with my move tool. Drag it onto the Original. Before letting go of the mouse or pen, press and hold the option key. Then, let go of the mouse or pen. This will perfectly register the files one on top of the other. You can see this on your layers pallet (which I suggest you keep open on your screen at all times). I like to work positively, so I hide that dark layer (Option>layer mask). Then, select a soft brush with zero hardness with white selected and paint back the dark information where needed. The white reveals the layer below and black hides the layer below. You can switch back and forth between them by clicking the “x” key. Why is this important? If you went too far or painted outside the lines for your burn, by switching to black, you can put it back.
Back in the darkroom, I used my hands or a piece of cardboard with a hole cut in it to let the light shine onto what I was burning. The amount of time determined the final density. Yes, I did this all in the dark with that faint light on the paper. If I burned too long, the paper was wasted and thrown in the trash. Now, not only do we have the ability to add and then erase, but we can do it in any opacity we desire. The opacity of your brush is determined on the tool option bar from 0-100, but to speed things up, just press any number key and that will be your opacity. (1 equals 10%, 5 equals 50%, a fast 55 equals 55%). To make things even easier, your brush can change sizes on the fly as well. The bracket keys control the size. Left bracket reduces the brush size; right bracket increases the size. This allows you to burn in very fine detail areas or large, open areas.
When I am all done burning the areas I wanted darker, I flatten the image and drag the dodging file over the original. I hide that layer, (option – layer mask) and dodge with the same technique used for burning. When I’m happy, I flatten the file and move on to whatever else I needed to work on. By using this concept, you can add anything to your original, i.e. contrast, saturation, color temperature and more.
So some tips: First, you may ask, “Why a 16-bit tiff file?” There is way more information on a 16-bit file. As I said above, I like to work with a soft brush. The reason for a soft brush is so the edges of my burn blend better with the surrounding areas. The problem with an 8 bit file is that the transition areas do not hold enough information and many times will create radiation like bands those areas. The 16 bit file handles the transitions much better.
Second, I hear all the time, “I can do the same thing right in Photoshop with the burn tool, or by using a brush on multiply, or by using level or curves.” My answer: No, you can’t. It may seem like this will work, but Photoshop, as cool as it is, has no idea what image is in your creation. It knows 1s and 0s. Any time you try to darken a file in any way, Photoshop is just adding BLACK to your image. Any lightening will be adding WHITE. In some cases this works okay, but those colors on a detailed area will only contaminate the colors that were in the original file. That is why skin on a person turns RED when you burn in Photoshop without using files from your RAW capture. It is also why detail from a slightly overexposed wedding dress doesn’t magically show up when burning in Photoshop. That’s because it is not working with actual data from the scene. There is so much more we can pull from the RAW file and piece together to create a more powerful custom print.
There is an art to the physical part of using this concept, something that can’t be explained in text, but this is a beginning and now you have a concept you can grow on your on. With practice, you will develop skills to make this a speedy workflow and one in which results in a true custom print.
I will leave you with this: In my original training, it was stressed that, when looking at a print, nobody should be able to tell that anything was done to it. We shouldn’t see burn lines overlapping light areas and so on. We should just see a powerful image. The only time one should see a difference is if you placed an original and a custom print side by side. If we do so, we had better see the transformation. Give it a try, you will be glad you did.
 Carl Caylor began his career as a photo journalist and darkroom specialist. A beginning that would prove very beneficial to the new age of digital portraits in a Natural environment for both his guests and his students. He has shared his passion with photographers coast to coast in the USA, Canada, Mexico, and Korea. He is one of the most sought-after instructors in the country because of his “Hands-On” coaching approach. Learn more at: www.photoimagesbycarl.net


