


By Doug Hansgate
Too often, in today’s world, we rely on what has worked in the past: quality lighting, great photography, and image creation that stands the test of time. Unfortunately, that may not be enough.
So, let’s explore the use of photographic excellence and image manipulation to create images that sell to the modern world. After all, we can no longer rely on just creating beautiful images. They need to be images the public cannot create themselves. Our creation process needs to step up a notch. Our lighting, as usual, needs to excel and, today, our post-production work needs to be top-notch. You might ask, “How do I keep up? How do I stay up with the new technology in the equipment alone, much less the constant (it seems) updates to all the software applications?” I will be the first to tell you that it is not easy. But photography has never been easy if done right. We studied posing. We studied light. We studied the equipment. Then we built sets and traveled to seminars and workshops constantly, like the Texas School of Professional Photography. It never stopped, and we didn’t either.
My routine starts early, giving myself the quiet time in the morning before the studio gets crazy to work on personal projects including learning from other photographers. I never understood why someone would not invest a few dollars in their creativity. A good friend says that if he takes a class and comes away with nothing, it’s his own fault. His goal is to learn and, even if it is a small thing, it all goes to his collective knowledge.
 In that regard, we should all take note of that thought. Our collective knowledge is what gives us the edge in life and work. If I show you a technique for selecting the lights mask using Tony Kuypers actions, we need to train ourselves to amalgamate that ability into working on a portrait shot in bright light. The steps are just that, steps to a whole understanding; the whole being able to create visions that were not there or are only in our mind.
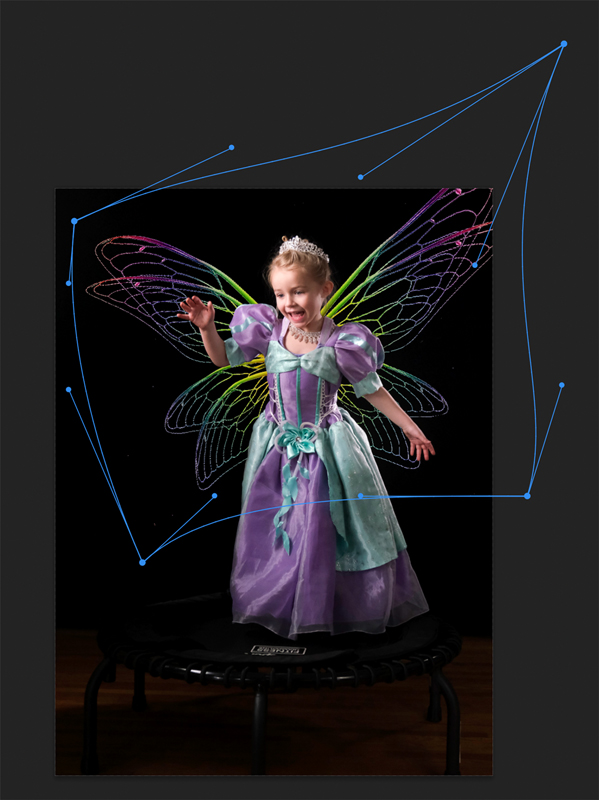
Now let’s discuss some techniques for creating the images that I call my “Enchanted Dream” images for young children and how I average $1200 in sales for each kid’s session. First, we must master the light. Create images that have good separation light. You will need that light for your software to separate our subjects quickly and easily. You’ll also notice that the young model in the image with the unicorn is jumping on a mini trampoline. That works great in the studio to provide fun for our young subjects and to give us the look of a fairy in the air. I shot this on a black background, knowing I would create a scene for it.
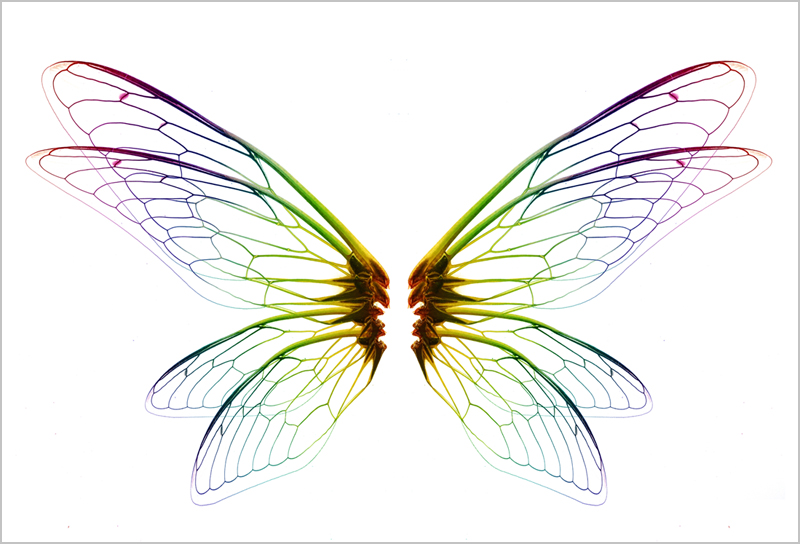 The next step in the creation process is to decide what ancillary images/graphics/compositing images would help tell the story I’m trying to create. In this image, I added fairy wings to the set. There are so many sources for images and graphics, including Adobe stock. Check out Envato for stock images as well. Of course, we can use AI for concept images from many alternative sources these days. However, the resolution is a problem that we need to address to upsize our Mid-Journey creations. For now, let’s stay with more conventional stock images without image resolution issues. For a couple of bucks, you get artist-created fairy wings to use.
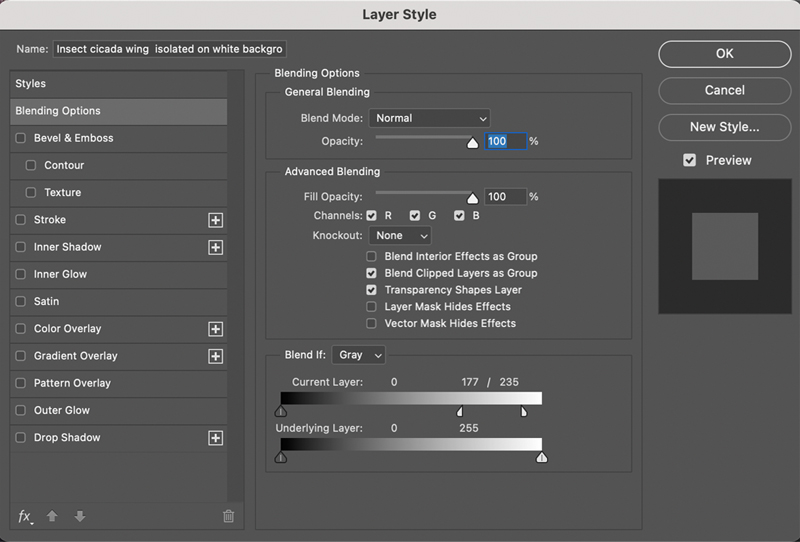
Dropping the Wing layer in Photoshop and using a blend mode to remove the white background in the wing layer is super easy. Just double-click on the wing layer itself, not the thumbnail, and you will get the layer-style pop-up. Slide the right triangle on this layer (blend if) bar. Move it off the white side of the (blend if) bar, and then, using the (alt/opt) key, break the triangle apart to feather the visibility of the white portion of the wing layer off.
Now, simply create the selection of your subject on the background layer (Select<Subject) then move to the winged layer and apply a mask. You will have to invert the mask in the mask layers properties.
You did it. The wings are now behind the model. Now, simply unlock the mask from the subject. Select the object (wing), and you can transform the shape of the wings (below). If you are still interested in the rest of the process, you can watch my YouTube video by scanning the QR code.
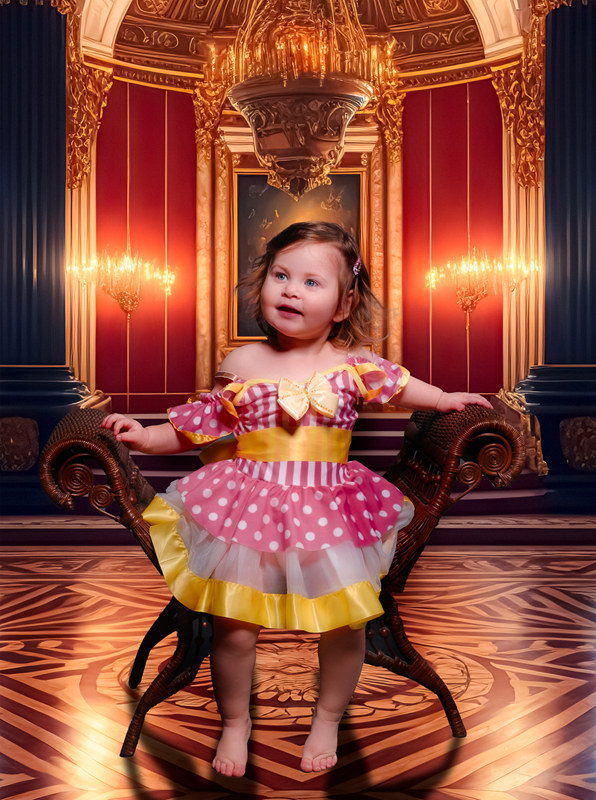
 Rather than walking you through the entire image creation, let’s use valuable print space to discuss why we do this much work (albeit less than three minutes if done right). We want to create imagery that the average GWC (guy or girl with a camera) can’t produce. We want to make a good living with our work. On the final page of this article are some examples of these techniques. You can be the judge.
There are so many uses for this style of imagery. No, I don’t create this style of work exclusively, but it is worth exploring for certain genres including kids, dance, athletics, and more. Is there a market for creative work in your area? I think so.
The Studio Session – I have found it easier for parents to choose between several themes before the photo session. I offer the following at the current time: Princess/Prince Castle theme, Garden Dreams, Fairy Mirror, I believe (flying session), Jungle Exploration, and Mommy & Me, but it is always changing. You can develop your ideas and sets. It is not really about the designs of the sets but more about getting clients to let you know before arrival what they envision for their child. Warning: be prepared to have this change as soon as the child gets in the studio; their creative mind can often take over. I base my sessions on time, so if they are having a great time and want more, the mom or dad can book another session immediately.
I also shoot tethered in the studio and give the mom instructions on how to favorite her shots in the studio as they are being shot. That way, I do not miss the little facial expressions that define that child. Not only does it give the parents a chance to get excited, but it also helps me to decide which images to edit further. Which, as you will see, is important. I schedule the reveal session before they leave.
Post-Production – This is where the article started. I will produce up to 15 images: all unique, some just basic edits and headshots, some full-on composites with backgrounds and additional imaginary items (wings, Unicorns, animals, you name it).
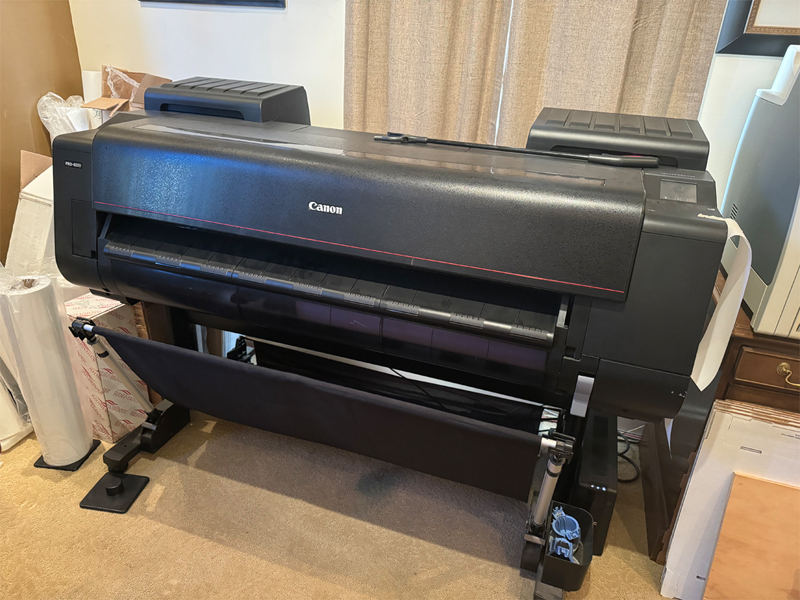
After editing, I print everything in-house. Yes, it is an investment. I have purchased a large-format printer and produce standard prints, silk prints, and canvas prints. My cost is about $.85 for an 8×10 and a 16×20 costs me approximately $3.50. I sell that print for $329 in a basic frame. The frame cost wholesale is less than $30.
As you see, the profit is all in the sales, so it becomes critical to have strong print sales. In years past, I would have a sales session with my clients and sit and discuss which images they liked. This invariably led to a one-hour to two-hour session in which, in the end, they would ask me which ones I liked and why and would go with that. So, the only real question was how to get them off their original budget and sell more. Now, I do none of that.
The Reveal Wall – This is basically a wall of prints, silks, and canvases, all done and ready to go for them. Prints are all mounted on foam core and done in-house. All they need do is pick them off the wall, and they can take them home and hang them. Yes, that means that almost all my prints are in frames (however, not sealed on the back in case they choose a different frame). They are brought into the room and told the prices are on each of the prints or canvases, and they take off the wall the ones they want hanging in their home. I leave them for a while after the original shock of what they have before them.
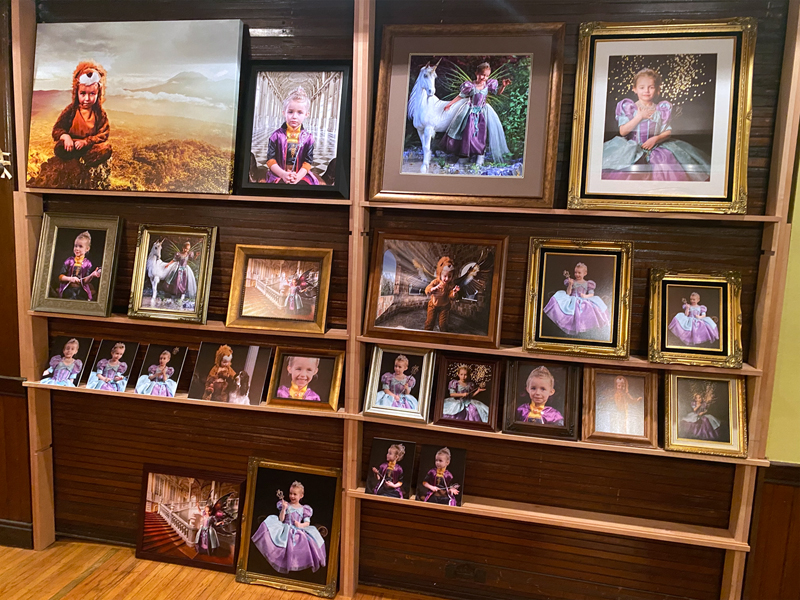
After ten minutes, I return and see how they are doing. Invariably, they have chosen a few they must have. Sometimes, they want a different frame, which I have my assistant go and change out. Then I ask them about any of the smaller images that were not framed and ask them if they wanted this print. If they say no, I immediately tear it in half and throw it in a trash bin. Of course, this elicits a response, and I say that I always destroy images that they don’t want as I don’t want someone rifling my trash and getting images of their child. Knowing that whatever they don’t buy will be destroyed, they approach the buying in a new light.
 Of course, I remind them of the grandparents’ homes and other friends and family when making the buying decisions. Often, it will come down to asking if they can put some images on hold for some time, which I will do with a deposit. Quite a few times, one or the other parent would call me after the reveal session within hours and ask if they could come back and get another image but were afraid to take it while their spouse was there.
I know some may feel that I am unduly putting pressure on the parents to spend more than they had planned. However, not once has a parent come back to me with regrets. I rest easy knowing that, years from now, this child will have a special image to remember their youth and it will bring a smile to their face.
 Some will question the investment in prints and canvases in the process. On average, it costs me about $80 in material to put on the display, not counting frames which are reused of not sold. With average sales well above $1,200 figure, I think it is a wise investment. I do produce everything in-house, and there certainly was an investment in the equipment up front to do this. But we invest in our camera equipment as well. This just helps to pay for all that effort and equipment.
I hope this article finds receptive ears and helps some studios to become more profitable. I enjoy sharing ideas that have worked for me. If you have any questions feel free to contact me through my website www.hansgate.com.
 Doug Hansgate is a New York based photographer working predominantly in the fashion and commercial fields while teaching as much as he can. He has been photographing professionally for over 40 years and his creative approach to photography, coupled with his ability to see and capture light, permeates his impressive body of work. His love for photography, passion for art, and desire to always be the best that he can be, has driven him to excel as an artist and educator.


