


by
Kory Bumgardner
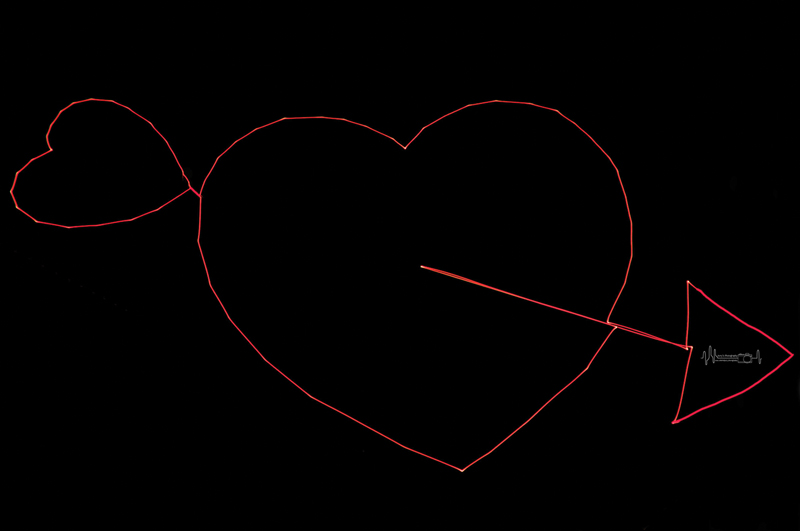
Light painting using a drone is an entirely different concept from the traditional light painting process where a scene or object is illuminated in the dark by using a moving light source during long exposures. Instead, lights are added to a drone to enable it to paint patterns in the sky, and Google Earth is used to determine the waypoints used for the pattern. This pattern is photographed from the ground using a camera, a sturdy tripod, and by setting the camera on “bulb” until the end of the flight. With each waypoint, the drone is instructed to turn around and show the light or not show the light to the camera. This fun and unique way to use a drone in a night sky is something I learned from Russell Klimas, a Colorado photographer who teaches virtual classes and has a number of YouTube videos.
A variety of lights including Lume Cubes, landing lights on the drone, or aftermarket strobes can be added to the drone with Velcro or gaffer’s tape. However, it is very important to know how your drone reacts to the weight of the lights, so practice during the daytime before attempting to do an entire flight. If you are using a Mavic Pro 2, a good solution is to use a small, translucent, plastic bottle cap taped underneath the landing light. This produces a similar effect of a light pointing toward the camera without the added weight of a Lume Cube or some other additional light source. Just keep in mind that landing and take-off may be more difficult, so use with caution.
To create these patterns in the sky, I use a program called Litchi which can be purchased from the app store on Android or Apple for around $25. Other apps are also available but, from my own experience, Litchi has more finesse because it can connect to Google Earth. By using Google Earth, you can trace your image with the drone if you have some patience.
Before going any further, it is essential to know if you are actually allowed to fly in whatever area you are planning to use. Apps like Airmap and B4UFLY can be used to keep you out of trouble. Even if flying is allowed in that area, you should always be aware of your surroundings and watch for helicopters or anything else in the air because they have priority over your drone. In addition, if you are using your drone to earn money, you will need a Part 107A and possibly a night waiver.
The objective is to find a big open area where you can safely fly without being bothered. A rule of thumb is to select an area about 900 x 600 feet. This is important because waypoints should not be too close or else the drone will not fly the pattern. Once that is done, it is time to program the waypoints of the pattern. My recommendation is to do this at home or somewhere comfortable because it can be somewhat time-consuming. When programming, you will need to know where you will be setting up your camera because the long exposure requires you to program the image upside-down.
While creating the waypoints, do them in sets of 99 and put each set in a folder and label each folder. The reason for this is that Litchi only allows up to 99 waypoints for each path you program into the app. Each time a path is completed, you will need to upload the next path. While uploading the next folder, I recommend covering your camera lens to avoid any bright spots on your image.
Once you’ve created the entire pattern, export each set of 99 as KML files. This is what Litchi uses to read the paths you’ve created. Once these are imported onto the Litchi online Mission Hub program, it is important to save the file and do a trial run on your phone using the Litchi app. If no errors are detected, your waypoints are far enough apart to allow the drone to fly unhindered. If an error is detected showing two waypoints are too close together, you will need to go back to Google Earth and fix the problem and re-export the KML file and try again until no errors are detected.
After all of the paths are working, it is time to go back and change the altitude because, when the overlay was originally created, it was “stapled” to the ground. I like to use an altitude of around 200 feet because I’m working on a horizontal plane, and if I go much lower I might lose the light depending on how large of a shape has been created. The camera lens is also a factor in determining the altitude.
Changing the altitude is accomplished with the Litchi app on your phone. First, load your mission, and then unlock it with the little “lock” icon. Once that is done, click on the “wrench” icon then the icon showing a dashed square with a “plus” sign. A new menu will pop up and you will hit “select all” and “edit” then adjust the altitude relative to home (which is the ground), and hit “OK.” Numbers should appear above the waypoints. Be sure to do this with each mission if you have more than 99 waypoints. Also keep in mind the drone heading and where the light will be. If you are using a Lume Cube taped to the back of the drone, your heading will be the opposite direction you are facing when taking the photo.
Another important step in the process is to set the speed of the drone while flying between waypoints. When doing detailed shapes, I like to stay between 7 and 11 miles per hour. This is done to keep the drone from overshooting a waypoint and having to backtrack. In addition to the speed, I will go into the settings in the Mission Hub of Litchi and change the path to “Curved Turns” and set the default to “0” to keep the drone from flying through each waypoint. Of course, all of this applies to horizontal images. To learn about vertical, 3D, or motion light painting, contact Russell Klimas or check out his YouTube videos.
Next, it’s time to talk about camera and settings. First, be sure to use a sturdy tripod with the camera set on “bulb.” It is advisable to use a camera trigger and have a lens cap handy. You will also want notes on any waypoints that you don’t want to be shown on the photo. Otherwise, plan to spend extra edit time in Lightroom or Photoshop to remove them. The exposure can be from one to ten minutes. Most of the time, an ISO of 100 can be used unless your light source on the drone is dim. The typical aperture I use is f8 but it is a good idea to test your camera and location in advance to make sure your settings are accurate.
When positioning the camera, make sure the entire shape will be inside the frame.
We usually go out in a small group to photograph these patterns. One person will actually fly and watch the drone while others capture the images.
A typical mission involves the drone flyer calling the others to open the shutter when the drone is to start a pattern. The flyer will also tell the others when to cover and uncover the lens whenever the drone is heading to a waypoint that does not need to be recorded on the photograph and to close the shutter when all of the pattern is photographed. Then, the photographers will check the images to see if anything needs changing. If necessary, we can reposition the camera, adjust settings, and fly again after a battery change. We also have a Facebook group for sharing patterns that can be downloaded.
Drones have opened up a new world for creativity for photographers, but it does take some practice and patience. Not only does it involve some basic knowledge of photography, it also involves learning some important aspects of aviation. Do your homework, and be safe while having fun.
 Kory Bumgardner is a full-time wildlife photographer who travels the world in pursuit of exciting images. She lives in Genesse, Colorado, and is a Master Photographer and CPP. Kory is also an FAA Certified Pilot. Her images have won numerous awards including PPA Diamond Photographer of the Year in 2021. Learn more about her at: www.korysphotography.smugmug.com.


