


By Rob Hull
“Light makes photography. Embrace light. Admire it. Love it. But above all, know light. Know it for all you are worth, and you will know the key to photography.”
George Eastman
George Eastman uttered these words over 100 years ago, yet this is as true today as it ever was. Successful photographers are students of light. They endeavor to understand light. To recognize even the slightest subtlety. They strive to understand how light will interact with their subject, the camera, and the viewer.
Understanding light is essential if you want to advance your photographic skills. But light is a very broad and deep topic. We’ll focus on building a framework of understanding. Photographers describe light in terms of three essential elements, brightness, color, and direction. Collectively these features define the quality of any light.
Brightness – This seemingly benign characteristic of light is actually quite complex and when you use the term brightness, you need to understand exactly what it means. Brightness is a human perception and the sensitivity of our eyes changes as the magnitude of the light changes. The sensitivity of our eyes decreases as the magnitude of the light increases. This can vary from person to person so in reality, the human perception of brightness can’t be measured. This is the same reason that you should never judge the exposure of your image simply on the preview on your camera’s LCD screen. Your perception of the brightness of the image changes as the ambient light changes.
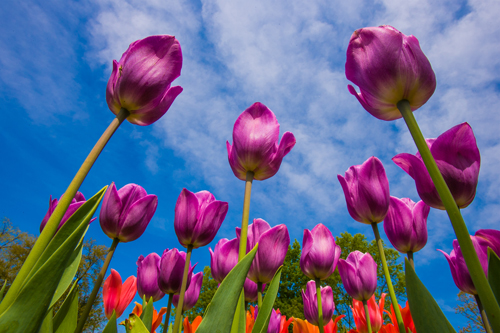
The sensitivity of digital cameras does not vary like our human perception, so photographically we use a more empirical method of measuring brightness. First, we measure the brightness of light created by a light source with lumens. A few years ago, the standard for indicating brightness for light bulbs changed to the more accurate scale of lumens. To put things in perspective, consider that a candle on your dinner table provides about 12 lumens of light. A 60-watt incandescent light bulb provides about 840 lumens. Today you can buy a 12-watt LED light that provides 850 lumens (you can see why we can no longer measure the brightness of light bulbs using watts).
If you recall the inverse square law, you know that the “brightness” of the light drops as it travels over a distance. When taking a photograph, you’re more concerned with how much light actually reaches your subject. Light falling on your subject is called Incident Light. To measure this light, you can use an incident light meter. These meters usually have a white dome, and you stand at the subject’s position and point the light meter at the light source.
The density of the light that falls on your subject is measured as illuminance. Specifically, you measure lumens per unit area. In the United States we use lumens per square foot. The result is expressed as footcandles. The rest of the world uses the metric version of lumens per square meter expressed as lux. Don’t worry about the terminology, light meters convert all their measurements to photographic units of ISO, Aperture, and Shutter Speed, all based on a calculated Exposure Value.
 Measuring the incident light striking your subject is the most accurate way to calculate exposure. But most cameras use light meters that measure the light reflected off your subject. The reflected light is the product of the incident light from your light source and the interaction with a surface. This reflected light is described using the term luminance. This luminous intensity is measured using an international standard unit of measure, candela/square meter. Again, this is all internal to the metering system and your camera will calculate an Exposure Value that is used to set the appropriate ISO, aperture, and shutter speed.
Color – Any thorough discussion of color runs the risk of slipping easily into the deep end – and it is deep. For the Readers Digest version, we’ll accept that color, like brightness, is a human perception. But unlike brightness, empirical measurements are a little more elusive. We can’t just measure the wavelength of light and assign a color.
For this reason, color models have been developed to help describe how colors can be represented. These models are mathematical systems that can be quite abstract. Photographers should begin with the CIE Color Space. It’s a model that was developed in 1931 and it attempts to describe the human perception of visible colors.
When you take a slice out of the model, it can be displayed on what is called a CIE Chromaticity Diagram. This is the graphic representation of the total human visible gamut and is most likely the illustration that you’ve seen most often. This model is often used as the foundation upon which other color spaces and models are compared. You may have seen this diagram with boundaries for sRGB, Adobe RGB, and other color spaces. An important distinction of this type of color model is that it is considered device independent. It simply illustrates the spectrum of human vision and you may find a color within the color model that you can’t reproduce.
Color Models that are considered device dependent include the RGB and CMYK Color Models. They are device dependent in that they differ depending upon how the color is created. The CMYK color model is based on mixing Cyan, Magenta, Yellow, and black inks in a printing process. While the RGB color model is based on additive light as is produce by a computer display that adds Red, Green, and Blue light to create a spectrum of colors. Within the RGB Color Model you’ll find different color spaces such as sRGB, Adobe RGB, and ProPhoto RGB. Each of these varies based on the capabilities of the devices that produce the colors.
You may also have heard the term color gamut. This term can be confusing since it has different meanings when we talk about color and photography. The usage of the term gamut is traced back to the medieval Latin gamma ut which was originally the name of the lowest note in the medieval musical scale. It was then applied to the whole range of notes in medieval music.
Color Gamut is used when describing systems that produce colors, like a color printer, a television set, or projector. The color gamut defines the full range of colors that can be produced by a particular device. This range of colors may not be as large as the original image so when you output an image to different devices or change mediums – such as paper – some of the colors in the original may be lost in the process.
Direction – The direction of light is just that, the direction from which the light falls upon your subject. It’s a pretty straightforward concept but there’s a little more to it that just the orientation of the light. Direction also helps define how hard or soft a light may be. When we discuss the direction of light, we need to consider two dimensions, the angle of the light, and the contrast of the light. The angle is simply a measurement of how far off the subject-to-camera axis a light is placed as measured from the center of the light. Contrast helps describe the size of the light source.
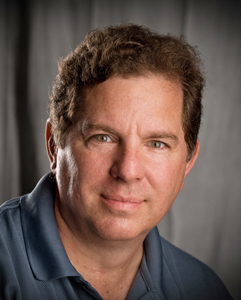
Any light placed near the axis of the camera will create an even lighting pattern on your subject. By itself, this pattern is considered flat in that it does little to show texture and depth. The most common usage of a light in this position is as a fill light to fill in shadows created by other – usually brighter – lights. In general, this is not a good position for placing main lights.
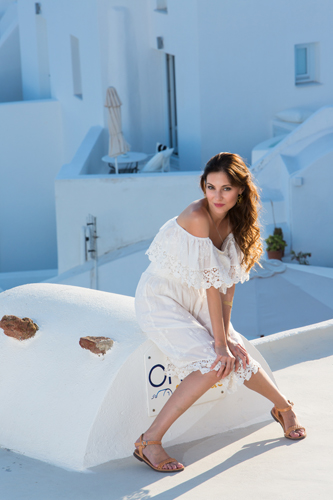
Perhaps the most common position to place main lights is at 45° to the left or right of the camera. Such a position does a great job of defining shape, texture, and depth by creating beautiful shadows without losing too many features in deep shadows. It’s important to remember that the light can be raised and lowered to ensure that the shadows fall pleasingly on your subject.
The farther around the subject you move your lights, the more dramatic the results. This position is used to create split lighting patterns and can be quite effective for some subjects. A film noir style headshot could look great with such lighting, but it may overpower a glamour or infant portrait.
 When you pass 90° you’ll find that the lights seldom provide the story telling power of a main light placed closer to the camera position. But they can be extremely effective for specific tasks. We could call these lights the “Special Teams” of the lighting world. Lights placed in this position can be classified as accent lights. Alex Smith, of the Digital Photography School, defines Accent Lights as “typically a very controlled light source that highlights specific areas of the subject. It can be a hair light that gives you some separation from a background, or a side light that illuminates the drops of sweat on an athlete after an intense workout.”
A light placed behind the subject can either be pointed toward the subject to provide an accent edge, or toward the background, to provide background lighting. A light pointing toward the subject can create a thin rim light that provides nice separation between the subject and the background. This is especially useful when using dark backgrounds.
In addition to the angle of the light, we need to consider the size of the softbox. Any softbox will produce light that will strike the subject from many angles. A light source is said to be high contrast if the family of angles of the light striking the subject is relatively small. A small flash or studio light would be a good example. This type of high contrast light is also called a hard light in reference to the edge of the shadow that is created by the light.
Conversely, a low contrast light may be described as a soft light as the light strikes the subject from many different angles. Light from a softbox or large umbrella can produce a soft shadow edge. But it’s important to understand that contrast is not based only on the physical size of the light source. The size of the light source is relative to the distance to your subject. A large umbrella light that is placed far from your subject can create shadows and contrast similar to a small flash.
 Rob Hull and Tony Corbell will be teaching a class, “Between Light and Shadow,” at Texas School 2023. This class explores the three key elements that comprise light – the most fundamental ingredient in any photograph. Learn more about their class at: www.TexasSchool.org.


