


“Having fled the city. Narissa has removed her mask and is seeing her true self for the very first time.”
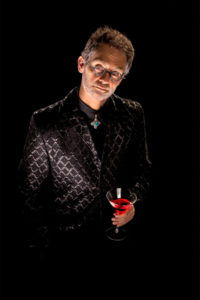
by Dave Montizambert
This image of model Kelsey Barnwell is a study in color harmony, mixed lighting, and perhaps an attempt at humor. The job at hand was to create an eye catching image of this fiery red dress for Vancouver fashion designer Sam Stringer and to do so relying on lighting and photographic skills rather than Photoshop. Sam made my job easier by sourcing Kelsey and the makeup artist Ana Maria Badila leaving me to supply the location, lighting, photography, and concept (with the help of my publicist/wife Sylvianne).
Part of my concept was to contrast the vibrant red of this beautiful creation against a cold blue city skyline. The deep blue sky and its blue light reflecting on the Vancouver city skyscrapers would create wonderful color harmony with the dress. I wanted everything except the dress to appear cold in image and so I processed the raw files with a bias to blue (3700° Kelvin for color temp in Lightroom). Kelsey’s fair skin with the additional blue balance was perfect. Fair skin tends towards blue while darker flesh towards yellow, so it helped lend a cold and ethereal look.
For my perfect background, I needed the blue sky behind the camera to create a blue wash of light over the towers of the city. For this to work, it was necessary to pick the time of day when the sun starts to move behind the buildings. This would minimize direct sunlight on their front sides. Too much direct sunlight here would negate the cold blue look (see setup on next page). To separate Kelsey and the dress from the background, I chose to shoot at f4. This aperture opening created a shallow depth of field which threw the city scape nicely out of focus while leaving it distinguishable as a city.
The open sky lighting on the front of Kelsey gave an incident meter reading of f4 at 1/160 of a second at 100 ISO and an incident meter reading of the direct sunlight striking the back of Kelsey read F4 at 1/1000 (see image A on next page) shot at f4 at 1/160 of a second. This is pretty close to how this scene would photograph if I had set my camera to “P” for Program or “A” for Automatic.
 To find an exposure of the city, I simply set the camera to f4 then took a number of test exposures bracketing the shutter-speed. A quick look in Lightroom on my “Tether-Tooled” MacBook Pro revealed f4 at 1/1600 to be my favorite. An incident meter reading of the backlighting on Kelsey was asking for a longer shutter at 1/1000, so at 1/1600 the backlighting is recorded at 2/3 of a stop below the camera setting. Due to the back-angle of the sunlight, its brightness on the subject will appear brighter than the incident meter reads. When light comes from beyond 90° from the camera angle, it appears much brighter than an incident meter suggests. I was totally happy with the look of this minus 2/3 ratio.
As I mentioned, the open sky is lighting the front of Kelsey and read f4.0 at 1/160, this will expose at 3 and 2/3 stops under the camera setting of f4 at 1/1600. In other words, the open sky will deliver low level fill lighting to Kelsey’s front while the direct sunlight will appear very bright on the back edges of Kelsey’s body, dress, and hair (see Image B to see the image shot at f4 1/1600). Note how the backlighting on the dress and Kelsey is perfect, adding extra depth to the image. But the front of Kelsey is 3 and 2/3 stops underexposed and is lit with boring flat light.
Here’s where the mixed light part comes in. To create more suitable lighting and exposure on the front of the subject, a small Chimera soft box (0.6 x 1.0 meter) attached to an X3200 White Lightning mono block studio strobe plugged into a portable Pro-Foto battery pack was placed 2.5 meters from Kelsey on the camera-right-side. The strobe is triggered with a Pocket Wizard Plus III on the light and a Pocket Wizard Flex TT5 on the camera.
One of the cool bits of working with Pocket Wizards and Sekonic meters together is that I can set the meter so that every time I press the take-a-reading-button, it sends a signal to the Pocket Wizard receiver to fire the light. Isn’t that just the greatest thing since chocolate truffles? How often do photo-gear manufacturers cooperate like this? Placing this light to the side of Kelsey makes for light the skims the front of the dress creating lots of texture and beautiful dramatic high-contrast shadows that are slightly filled in by the open sky (see Image C). There is, however, one thing wrong with this setup. Because I’m shooting at 1/1600, the camera shutter is unable to sync with the strobe flash at this shutter-speed. The fastest it can handle is no more than 1/200 of a second.
This is not a problem because the Pocket Wizard Flex TT5 happens to be programmable. I can actually set it to create an offset that causes the camera to only collect the end portion of the strobe burst, this gradual trailing off portion of the burst occurs right after the strobe peaks. You are, of course, losing a lot of the strobe power by omitting the peak. But since we’re shooting with a fairly powerful strobe, and with our camera aperture wide open, we get more than enough light. So the imaging sensor receives mostly constant light during the travel of the opening shutter-blades rather than an intense short light-spike for a fraction of the exposure.
By setting the strobe to its highest power to ensure the longest strobe burst duration possible, and then by tricking the whole system with an offset set on the Pocket Wizard Flex TT5, I’m able to use strobe lighting with high shutter speeds. This technique works best on strobes that take longer to dump their full charge of light onto the subject. The most suitable strobes are typically older and/or more powerful models (older is better because newer designs tend to use more capacitors and so dump faster, perfect for freezing action but not a good thing for Hypersync). Also, those units that generate more light need more time to dump this charge onto the subject. So, in a nutshell, slower (within reason) is better!
So there you have it, a mixed lighting setup fully exploiting the available light sources—sun and open sky with a mix of heavily modified strobe lighting. At the request of Pocket Wizard, I created an in-depth how-to video during this shoot as well as a video on how to perform the required preliminary Mixed Light & HyperSync setup test. It can be viewed on my website on DaveOnDemand at www.montizambert.com.
 Dave Montizambert will be teaching at the 2018 Texas School of Professional Photography. He lectures internationally on lighting, digital photography, and Adobe Photoshop. He is also a published author having written two books on lighting and digital photography plus numerous magazine articles on these topics in North America, Europe, Russia and Asia. Learn more at www.montizambert.com.


