


by Guy T Phillips
Headshots sound relatively simple to do, right? Yes and no. Sure, you can slam something together quickly and your client might just like it. But delivering consistent, professional, quality images that will create repeat clients and bring you more new clients requires planning and education. So, let’s highlight some of the key topics that, when implemented within your site and workflow, can make a positive experience for your head shot clients.
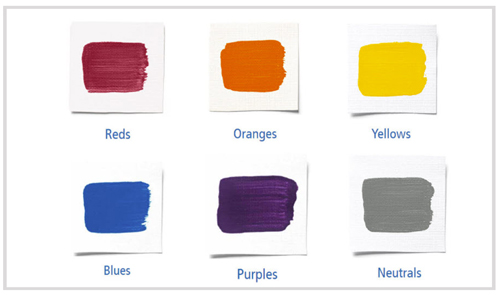
What should I wear? Educate your client to consider natural colors that compliment their skin tones, eyes and/or hair. That could mean natural greens or browns or blues. But if they prefer purple or any of the colors shown in the illustration, that’s great, too. Just try to avoid extremes of solid black or solid white. Doing so helps the headshot draw attention to your client’s face, not their clothes.
Suggesting solids over patterns and avoiding busy looks can lead to a more pleasing image, just like long-sleeves rather than short sleeves, and V-necks over crew. Texture such as in a woven sweater or a hounds-tooth jacket is great as well. Including props that mean something to your client, such as a favorite watch or hat or gold club and even some coordinated jewelry is fine, too. But keep it simple.
If the client is planning on wardrobe changes, recommend an undergarment like a camisole or V-neck t-shirt to make for faster outfit changes and to ensure the outer garments stay fresh and wrinkle free. Getting push-back on your ideas? Reassure your client that you want them to, above all, wear what THEY like, and what makes THEM feel good!

To borrow advice from one of my mentors, “You have two ears and just one mouth. Ask a question and let them talk about themselves.” Schedule an introductory call and ask your client a few key questions. Be sure to take notes. Confirm what you heard and what the next steps are and you’ll put them at ease while you begin to build a relationship!
Creating color harmony can be easier when you collaborate with your client. The following samples show how an Old Master’s Tan background can be used with a variety of colors. While the background’s colors emphasize an ‘earthy, sturdy or rustic’ mood, the right color can bring the image together, and give your client choices they will really enjoy!
Posing is one of those things that you don’t hear enough about nowadays but is an integral part of any great head shot. There are several key points worth considering when coaching your client in front of the camera.
Body – Their most flattering image will have their body turned at a 45 degree from the camera with the main lighting flowing across their body. This gives depth and dimension and helps avoid the “driver’s license look.” You’ll want to keep in mind the client’s posture, with their back straight, and lifting themselves with a deep inhale as needed.
Head & Neck – We’ll start with a slight turn of the head to their right (2/3), then straight on (full), then slightly to their left (2/3), looking for their best side. These first three images won’t be keepers as much as they are giving us a starting point to consider.
For most images, the client’s head will usually be turned to the camera. But sometimes a pose with their head turned away can have a dramatic impact. Also, look for the best level for the chin and ask the client to pull their head forward ever-so-slightly as if you had a string to pull their nose towards the camera. Then, elongate the neck as if there was a string on top of their head being gently pulled upwards. If your client is a “tilter,” make sure to include a tilt in your images so that they emphasize their unique style.
Eyes – You’ve probably heard about “smize” from the show “America’s Next Top Model” or maybe you know the concept of “squinch” from photographer Peter Hurley. Either way, the idea is to express confidence with the client’s eyes. An easy way to get started on a good smize/squinch is to have the client imagine they’re trying to read something really small, like the bottom line of an eye chart, yet keep a smidge of a smile on their face at the same time. Or, try for an expression on their face as if they know they are about to win against their nemesis.
Hands & Wrists – For ladies, the best look for hands is to show the side rather than the back of the hand. Bending their wrists downward generates more interest. Pockets are helpful when posing hands if we remember to show a thumb or fingers when in view. For a more casual look, have the client rest their hands in their back pockets as well.
Arms – Introducing a bit of space between a client’s arms and body will lead to a more flattering look as well. Sleeves are better than sleeveless. Feel free to let them cross their arms, too. But keep as much of their hands exposed (especially if they have fine jewelry or a watch they want to show) or use their arms to create triangles for interest.
Legs – Point their front leg and toes (nearest the camera) towards the camera, bending that same front leg slightly. I sometimes use a small prop to raise the front leg to add dimension to the pose. Placing more weight on back leg will be of help.
Being able to produce stunning and exceptional head shots can provide profitable opportunities for your photography business that will have your work in demand. By showing your clients how to use images to build their own brand, you can become an invaluable asset to your clients.
 Guy T. Phillips, long-time resident of Highland Village, Texas, will be hosting a hands-on class titled “Headshots and Beyond” at the iHeart Photography Conference and Expo in October 2021. He’ll be showing you how to create rock-solid headshots that will have you in demand. Guy T’s enthusiasm for sharing his knowledge with others has made him a popular instructor on a variety of topics. So be prepared to have fun and laugh while you learn the things you didn’t pick up from a manual or an online video.


